
Wall Light Installation Guide 2026: Step-by-Step (India)
TL;DR
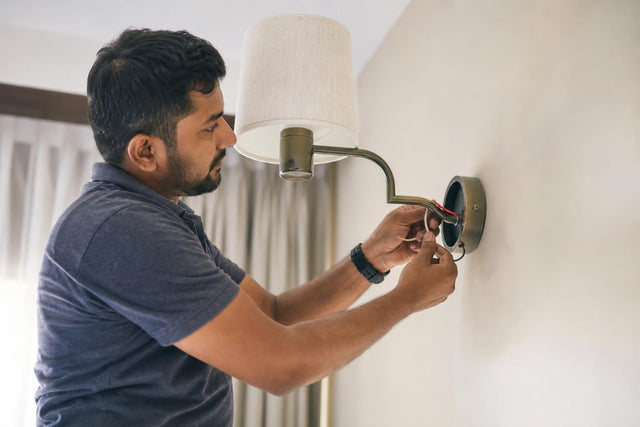
This wall light installation guide walks you through every step of mounting and wiring a wall light in an Indian home, from switching off your MCB to flipping the switch on a finished fixture. It covers tools you need, Indian wire color codes (IS 732:2019), drilling into masonry walls, connecting wires safely at 220–240V, and getting the mounting height right for every room. Follow along whether you are installing your first sconce or replacing an old one.
Installing a wall light sounds simple until you start searching for instructions and realize most guides are written for American homes. They assume drywall, 120V circuits, and wire colors that will actively mislead you in India. Black is the neutral wire here, not the live wire. Your walls are brick and concrete, not hollow drywall. And a mistake at 240V is far more dangerous than one at 120V.
This guide is written specifically for Indian homes. It gives you the full installation process on this page, step by step, with the safety rules and specifications that actually apply to your electrical system and construction type.
If you are still choosing a fixture, browse ALC Studio’s wall light collection to compare specs, dimensions, and finishes before you start.
Before You Begin: Choose Your Installation Type
Wall lights connect to power in three ways. Your installation type determines the complexity of the job ahead.
Hardwired installation connects the fixture’s wires directly to your home’s electrical wiring inside a junction box, controlled by a wall switch. This is the cleanest option (no visible cords) and the most permanent. It is also the most involved. If a junction box already exists at your desired location, a confident DIYer can handle this. If not, hire a licensed electrician to run new wiring through your masonry walls.
Plug-in installation uses a cord that runs from the fixture to a standard wall outlet. The fixture mounts to the wall with screws but does not connect to hidden wiring. Much simpler to install. The trade-off is a visible cord, which some homeowners manage with cable clips or cord covers painted to match the wall.
Battery-operated/wireless fixtures need no electrical work at all. Mount the fixture shell with screws and insert batteries. These are perfect for rented apartments. Brightness will be lower than mains-powered options, so they work better for accent lighting than task lighting.
For new construction or major renovations, go hardwired. For rented apartments, plug-in or wireless. For retrofitting in an owned home with no junction box, the decision depends on whether you are willing to pay an electrician to chase new wiring through brick or concrete.
This guide focuses on hardwired installation (the most common and most complex method), with notes for plug-in where relevant.
Tools and Materials You Will Need
Gather everything before you start. Nothing kills momentum like a trip to the hardware store mid-installation.
Essential tools:
- Non-contact voltage tester (pen-type that beeps near live wires, your most important safety tool)
- Drill with masonry bits (for brick/concrete walls)
- Spirit level
- Phillips and flathead screwdrivers
- Wire strippers (not a knife, not your teeth)
- Measuring tape
- Pencil
- Hammer (for tapping in wall anchors)
Materials (usually included with your fixture, but verify):
- Mounting bracket / crossbar
- Wire connectors (Wago lever connectors or traditional wire nuts)
- Electrical tape
- Wall anchors: plastic expansion anchors for lighter fixtures, metal expansion bolts for heavier ones
- Screws for the mounting bracket and fixture
Not always included (buy separately if needed):
- Wall anchors rated for your wall type and fixture weight
- A retrofit ring or larger backplate, if the junction box opening is bigger than your fixture’s canopy
A stud finder is less relevant in Indian masonry homes but useful if your home has gypboard or false wall sections.
Step 1: Switch Off the Power and Verify It Is Dead
This is not optional. This is how you stay alive.
Go to your home’s distribution board (the grey or white panel with rows of switches, usually near the main entrance or in a utility area). Identify the MCB (Miniature Circuit Breaker) that controls the circuit for the room where you are working. Flip it to the OFF position.
Now go back to the junction box or existing fixture location. Hold your non-contact voltage tester near the wires. If it beeps or lights up, the circuit is still live. Go back and try a different MCB, or switch off the main breaker.
Never rely on just flipping the wall switch. A wall switch only breaks one wire. The other wire may still be live. Always confirm at the MCB and verify with the tester.
If your home has an RCCB (Residual Current Circuit Breaker) in the distribution board, that is the device that protects against shock from earth leakage. It is a different device from the MCB, and both serve important safety functions. You do not need to switch off the RCCB separately; switching off the MCB for that circuit is sufficient.
Step 2: Understand Your Wires (Indian Color Codes)
This is where most international guides will get you in trouble. Indian homes follow IS 732:2019 for wire colors, and they are different from US and UK standards:
| Wire Function | Color in India | Color in US (for contrast) |
|---|---|---|
| Live / Phase | Red | Black |
| Neutral | Black | White |
| Earth / Ground | Green or Green-Yellow stripe | Green or bare copper |
Notice the critical difference: black is neutral in India but live in the US. Following a US guide without adjusting for Indian color codes could mean connecting a live wire where a neutral should go. Indian homes operate on 220–240V AC at 50Hz, which makes any wiring mistake significantly more dangerous than in 120V countries.
Your wall light fixture will have its own wires, typically labeled or color-coded in its manual. Match them correctly:
- Fixture live wire → House live (red) wire
- Fixture neutral wire → House neutral (black) wire
- Fixture earth/ground wire → House earth (green/green-yellow) wire
If the wires inside your junction box do not match these expected colors, or if you see damaged insulation, blackened wires, or burn marks, stop and call a licensed electrician.
Step 3: Remove the Old Fixture (If Replacing)
If you are replacing an existing wall light, remove the old one first:
- With the power confirmed OFF, unscrew the canopy (the decorative plate against the wall) or remove the fixture from its mounting bracket.
- Disconnect the wire connectors joining the fixture wires to the house wires. If they used wire nuts, twist them counterclockwise. If they used Wago connectors, push the lever to release.
- Unscrew the old mounting bracket from the junction box.
- You should now see the junction box with house wires extending from it.
If this is a new installation and a junction box already exists, skip to Step 4.
If there is no junction box at your desired location, you need one installed. This means running new wiring through your masonry wall (chasing channels, laying PVC conduit, plastering over), which is a job for a licensed electrician. The rest of this guide assumes a junction box is present.
Step 4: Check the Junction Box and Canopy Fit
Before mounting anything, hold your new fixture’s canopy (backplate) against the wall over the junction box opening. The canopy should fully cover the opening and any surrounding damage or paint gaps from the old fixture.
A common real-world problem practitioners report: the junction box opening is too large for the new fixture’s canopy. If you see a gap, you need a larger backplate or a retrofit ring to bridge it. Check this before you start mounting.
Also check the junction box orientation. Some fixtures require a horizontal junction box, others need a vertical one. If your box does not match the new fixture’s mounting bracket, an electrician can reposition it. This is one of the most common surprises during installation.
When evaluating decorative wall light options, always compare the canopy diameter listed on the product page against your wall opening.
Step 5: Attach the Mounting Bracket
The mounting bracket (also called a crossbar) is a metal bar with holes that serves as the bridge between the junction box and the fixture.
- Hold the bracket against the junction box and align the screw holes.
- Thread the provided screws through the bracket into the junction box tabs. Tighten with a screwdriver.
- Place a spirit level on the bracket to confirm it is perfectly horizontal. A crooked bracket means a crooked fixture, and once it is mounted, everyone will notice.
- If the bracket wobbles against the wall, check whether the junction box itself is recessed too deep or sitting proud. You may need to adjust the box or use spacers.
Pull the house wires through the bracket opening so they are accessible for the next step.
Step 6: Connect the Wires
This is the core electrical step. Work carefully.
-
Strip the wire ends. If the house wires or fixture wires are not already stripped, use wire strippers to remove about 12–15mm of insulation from each wire end. Do not nick the copper conductor. Nicked copper creates weak points and hot spots.
-
Connect live to live. Join the fixture’s live wire to the house live (red) wire using a wire connector. If using a wire nut, hold the stripped ends together, insert them into the wire nut, and twist clockwise until tight. If using a Wago connector, push the lever up, insert the wire, and push the lever down to clamp.
-
Connect neutral to neutral. Join the fixture’s neutral wire to the house neutral (black) wire the same way.
-
Connect earth to earth. Join the fixture’s earth wire (if present) to the house earth (green/green-yellow) wire. This connection ensures that if a live wire ever touches the metal body of the fixture, current flows safely to ground and trips the MCB/RCCB instead of flowing through someone who touches the light.
-
Wrap each connection with electrical tape for additional insulation, especially if using wire nuts.
-
Tuck all connected wires neatly into the junction box. Do not force or crimp them. Wires should fold in without pinching.
Step 7: Mount the Fixture to the Wall
With wires connected and tucked into the junction box:
- Align the fixture with the mounting bracket. Most fixtures attach with screws, a threaded nipple, or a slip-on mechanism. Follow your fixture’s manual for the specific method.
- Secure the fixture to the bracket. Tighten all screws firmly but do not overtorque, especially on fixtures with glass or ceramic components.
- Adjust the canopy so it sits perfectly flush and level against the wall. Many fixtures have adjustable screws on the mounting plate for fine-tuning. A crooked canopy is the most visible sign of a sloppy installation.
If your fixture is particularly heavy, or if you are mounting to a section of wall without a junction box (for plug-in models), you may need to drill anchor points directly into the masonry. See the masonry notes below.
Step 8: Install the Bulb and Restore Power
- Install the recommended bulb. Check the fixture’s max wattage rating and do not exceed it. Exceeding the max wattage risks overheating the socket and wiring.
- If the fixture comes with an integrated LED module, skip the bulb step.
- Go to your distribution board and flip the MCB back ON.
- Flip the wall switch.
If the light turns on without flickering or tripping the breaker, the installation is complete.
If the MCB trips immediately, there is a wiring fault. Switch the MCB off, go back to the junction box, and check your wire connections. The most common causes: a loose connection, reversed live/neutral wires, or an earth fault. If you cannot identify the problem, call an electrician.
Drilling Into Indian Masonry Walls: Essential Tips
Most Indian homes are built with brick, concrete, or RCC (reinforced cement concrete), not the hollow drywall common in American construction. The drilling and anchoring process is different:
- Use masonry bits, not wood or metal bits. Masonry bits have a carbide tip designed for hard materials.
- Pre-drill pilot holes at a diameter slightly smaller than your wall anchor. Pilot holes prevent plaster from crumbling around the entry point.
- Avoid hammer drill mode on thin plaster. The vibration can cause cracks radiating outward from the hole. Use standard rotary drill mode and let the bit do the work.
- Choose the right anchors. Plastic expansion anchors work for lighter fixtures (under 2 kg). Metal expansion bolts or toggle bolts are necessary for heavier ones.
- Expect rebar in RCC walls. If your drill bit suddenly stops or makes a metallic grinding sound, you have hit reinforcement steel. Shift the hole location by 10–15mm and try again, or use a metal-cutting masonry bit.
- Wiring runs through PVC conduit embedded in Indian walls. If you are drilling near a known switch or outlet, drill carefully to avoid puncturing a conduit. A wall scanner can help locate embedded wiring.
Getting the Height Right: Room-by-Room Guide
Getting a wall light at the wrong height is one of the most common and most visible installation mistakes. In a masonry wall, moving a junction box means chasing a new channel, replastering, and repainting. Measure twice.
Always measure to the center of the fixture body, not the top or bottom edge. Fixture sizes vary widely, so the center is the only reliable reference point.
| Room / Location | Recommended Height (floor to fixture center) | Notes |
|---|---|---|
| Living room | 60–72 inches (152–183 cm) | Comfortable for both seated and standing eye level |
| Hallway | 60–65 inches (152–165 cm) | Space fixtures 2–3 meters apart for even light distribution |
| Bedroom (ambient) | 56–72 inches (142–183 cm) | Depends on ceiling height and furniture layout |
| Bedroom (reading/bedside) | 35–43 inches (89–109 cm) | About 12–18 inches above the top of the mattress |
| Bathroom (flanking mirror) | 60–65 inches (152–165 cm) | Eye level, one fixture on each side of the mirror |
| Bathroom (above mirror) | 75–80 inches (190–203 cm) | Only when side-mounting is not possible |
| Foyer / Entryway | 66–72 inches (168–183 cm) | Creates a welcoming first impression |
| Staircase | 72–84 inches above each tread | Measured from the individual tread, not the floor below |
| Kitchen (above counter) | 24–30 inches above counter surface | Task-oriented placement |
These numbers are guidelines. The right height depends on your ceiling height, fixture size, and the room’s purpose. For more detail on height and placement, see the sconce height and placement guide.
How to Pick the Right Wall Light for Your Space
Before you install, it helps to know which type of wall light fits the job. Choosing wrong means wasted effort, like installing a 500-lumen accent sconce where you actually needed a 2,500-lumen vanity bar.
Wall sconce: A decorative fixture for ambient or accent lighting. Most output 400–800 lumens, enough for mood lighting but not for tasks. A modern wall sconce with clean lines works well in contemporary Indian living rooms and corridors.
Vanity light: Designed for bathrooms and dressing areas. Engineered to throw focused, even light across your face for grooming tasks. A standard vanity bar with 3–5 bulbs outputs 1,500–3,000 lumens, two to six times more than a sconce. For vanity-specific mounting details, see the vanity light mounting guide.
Picture light: A narrow, directional fixture mounted above artwork. Casts light downward at a controlled angle without glare. Common in living rooms and hotel lobbies.
Swing-arm lamp / reading light: Has an articulated arm that extends, retracts, and pivots. Ideal for bedside reading because you can pull the light close and angle it precisely.
Up-light vs. down-light: Describes direction, not fixture type. Up-lights wash the ceiling to make rooms feel taller. Down-lights push light toward the floor for stairways and corridors. Many modern fixtures do both.
Flush-mount sconce: Sits nearly flat against the wall with minimal projection. Practical in narrow hallways where a protruding fixture could be bumped.
Specs That Matter When Buying
Understanding a few key specifications prevents buying a fixture that is wrong for its location or that will not work with your existing setup.
IP Rating (Ingress Protection)
A two-digit code showing how well a fixture resists dust and water:
- IP20: Dry indoor areas only (living room, bedroom)
- IP44: Protected against splashing water. The minimum for bathroom areas outside the direct shower zone
- IP65: Protected against water jets. Suitable for outdoor wall lights
If you are installing a wall light in a bathroom, check the IP rating. A dry-rated fixture in a damp location is both a code violation and a safety hazard.
Lumens (Brightness)
Lumens measure actual light output. Wattage measures energy consumption, which is not the same thing.
- Accent/ambient sconces: 400–800 lumens
- Bedside reading lights: 450–700 lumens, focused beam
- Bathroom vanity bars: 1,500–3,000 lumens total
When comparing wall lights with listed specs, look at lumens rather than wattage to understand how much usable light you are getting.
CCT / Color Temperature (Kelvin)
This determines whether the light looks warm or cool:
- 2700K–3000K (Warm White): Cozy, relaxed. Best for bedrooms, living rooms, and dining areas
- 3500K–4000K (Neutral White): Clean, balanced. Good for kitchens and bathrooms
- 5000K–6500K (Cool White): Crisp, energizing. More suited to offices
Indian homeowners frequently debate warm vs. cool lighting. For most residential wall light installations, 2700K–3000K creates the most inviting atmosphere.
CRI (Colour Rendering Index)
A score from 0–100 showing how accurately a light reveals true colors. Aim for 90+ for bathroom vanity lights (accurate skin tones) and picture lights (natural artwork colors). Cheap bulbs below CRI 80 make everything look washed out.
Dimmer Compatibility
LED fixtures need LED-compatible dimmers (trailing-edge type), not older leading-edge dimmers designed for incandescent bulbs. The wrong dimmer causes flickering, buzzing, or early fixture failure. Check your fixture’s product page before installing a dimmer switch.
Max Wattage
The highest wattage bulb the socket can safely handle. Exceeding it risks overheating. Always check the label inside the socket or in the manual.
When to Call an Electrician (and When You Can DIY)
This is an honest assessment. Practitioners on forums consistently advise that certain situations need a professional:
- No existing junction box at your desired location (running new wiring through masonry requires chasing channels, laying conduit, and plastering)
- Damaged or blackened wires inside the junction box
- Wire colors that do not match expected Indian standards
- No earth wire present in the junction box
- Converting a plug-in fixture to hardwired (routing wires into a junction box and making permanent connections)
- Any uncertainty at all about which MCB controls which circuit
As one practitioner noted on a tech forum: if the switch and the light location share the same wall, running wire is straightforward. If they are in different walls, you need to find a route for the new wiring, and if you do not know how to do that, call a professional.
What you can confidently DIY: Replacing an existing hardwired wall light with a new one (the junction box and wiring are already in place, and you are just swapping fixtures). Mounting a plug-in wall light. Installing a battery-operated fixture.
In Indian homes running on 220–240V, the margin for error is smaller. The cost of hiring an electrician for a few hours is trivial compared to the cost of an electrical fire or shock injury.
Quick Installation Checklist (Print This)
Use this as a summary reference while you work:
- [ ] Confirm fixture dimensions, weight, and mounting type match your wall and junction box
- [ ] Verify the canopy covers the junction box opening
- [ ] Switch off the correct MCB at the distribution board
- [ ] Test with non-contact voltage tester to confirm circuit is dead
- [ ] Remove old fixture (if replacing)
- [ ] Attach mounting bracket to junction box, check level
- [ ] Strip wire ends (12–15mm) with proper wire strippers
- [ ] Connect: fixture live → house red, fixture neutral → house black, fixture earth → house green/green-yellow
- [ ] Wrap connections with electrical tape, tuck wires into junction box
- [ ] Mount fixture to bracket, align canopy flush and level
- [ ] Install bulb (do not exceed max wattage)
- [ ] Restore power at MCB, test wall switch
- [ ] If MCB trips, switch off immediately and recheck wiring
For a walkthrough with photos of each step, see ALC Studio’s detailed wall light installation guide.
Frequently Asked Questions
What height should wall lights be installed at in Indian homes?
The standard range for most rooms is 60–72 inches (152–183 cm) from the floor to the center of the fixture. Bedside reading lights sit lower, at 35–43 inches. Bathroom vanity lights flanking a mirror should be at eye level, around 60–65 inches. Always measure to the fixture center, not its top or bottom edge.
What wire colors should I expect in an Indian home?
Per IS 732:2019: Red for live/phase, Black for neutral, Green (or green-yellow stripe) for earth. This is different from US and UK color codes. Never follow foreign installation guides without adjusting for Indian standards.
Can I install a wall light without a junction box?
For hardwired installations, a junction box is required. It provides a fire-resistant enclosure for wire connections. Plug-in and battery-operated wall lights do not need one since they do not connect to hidden wiring.
What is the difference between a sconce and a wall light?
“Wall light” is the broad category covering all wall-mounted fixtures. A sconce is a specific type designed primarily for ambient or accent lighting. Wall lights also include vanity bars, picture lights, swing-arm lamps, and linear fixtures. Every sconce is a wall light, but not every wall light is a sconce.
Do I need a damp-rated wall light for my bathroom?
Yes, if the fixture will be exposed to moisture or steam. Dry-rated fixtures are only safe for areas with no moisture exposure. For bathroom installations (especially near sinks, showers, or bathtubs), choose IP44 minimum.
Can I convert a plug-in wall light to hardwired?
It is possible, but the process involves removing the plug, routing the cord wires into a junction box, and making proper electrical connections. This should always be done by a licensed electrician in 220–240V Indian homes.
How far apart should hallway wall lights be spaced?
Space them 2–3 meters (roughly 6–10 feet) apart for even distribution. At closer spacing, light pools overlap. At wider spacing, you get dark patches between fixtures. The exact distance depends on each fixture’s lumen output and beam spread.
What tools do I need for wall light installation in India?
The essential list: non-contact voltage tester, drill with masonry bit, spirit level, Phillips and flathead screwdrivers, wire strippers, wire connectors, wall anchors appropriate for masonry, pencil, and measuring tape.
Explore ALC Studio’s wall lights to find fixtures with complete specs, including dimensions, finish options, and mounting details. ALC Studio also offers free design consultations to help with fixture selection, placement planning, and specification questions for Indian homes.
0 Comments
There are no comments for this article. Be the first one to leave a message!