
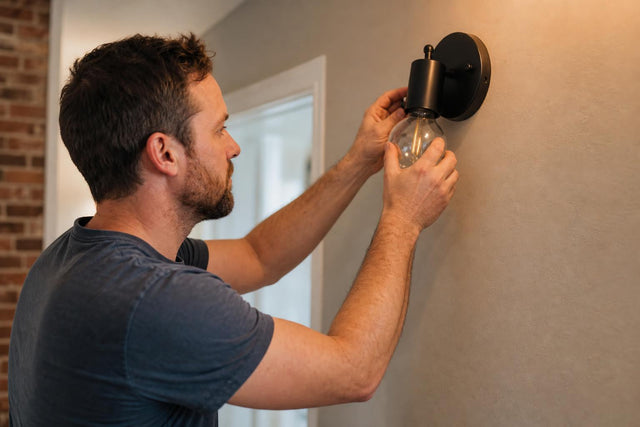
How to Install a New Wall Light: Step-by-Step Guide (2026)
TLDR
Installing a new wall light depends on whether you are replacing an existing hardwired fixture, adding a completely new hardwired point, or mounting a plug-in or battery wall light. Replacement is the simplest hardwired scenario, but it still requires turning off the breaker, testing with a voltage tester, and inspecting the junction box. Adding a new wall light where no wiring exists is electrical work and should be handled by a qualified electrician, especially in Indian brick and concrete homes. Plug-in and battery wall lights skip the wiring entirely and work well for rentals or rooms without an existing wall point.
Wall lights can transform a bedroom, corridor, vanity area, or living room. But before picking up a screwdriver, it pays to understand what “install a new wall light” actually means, because the answer changes based on what is already inside your wall.
This guide walks through the three installation paths, defines every technical term in plain language, covers safety rules specific to Indian homes, and explains exactly when to call an electrician. The goal is not to turn you into an electrician. It is to help you plan better, buy smarter, and supervise with confidence.
If you are still choosing a fixture, something like the Caral Wall Light shows the kind of specs (size, finish, bulb type) worth checking before installation begins.
What Type of Installation Do You Have?
Do not begin with the screwdriver. Begin by identifying the installation type. This single step prevents most problems.
1. Replacing an existing hardwired wall light
There is already a wall point, wiring, and usually a junction box behind the old fixture. This is the simplest hardwired scenario. You remove the old light and connect the new one using the same wiring and box. Seus Lighting’s installation guide explicitly states that their standard steps apply only when a usable electrical box and working fixture wiring already exist source.
2. Adding a new hardwired wall light where no wiring exists
This is a different job entirely. It may involve running new wiring, installing a switch, chasing the wall, setting an electrical box, and finishing the surface afterward. In Indian homes with brick or concrete walls and concealed conduits, this is electrician-led work, not a weekend DIY project.
3. Installing a plug-in or battery wall light
The fixture mounts to the wall mechanically and gets power from a plug or battery. No junction box needed. Kichler describes plug-in sconces as simpler than hardwired options because they just plug into an outlet source. This path works well for renters, temporary setups, or rooms without existing wall wiring.
Understanding which category your project falls into determines everything else: tools, safety requirements, cost, and whether you need professional help.
Wall Light Installation Glossary
These are the terms you will encounter in product listings, electrician conversations, and installation manuals. Knowing them before you start prevents confusion and mistakes.
Wall light / wall lamp / sconce
A light fixture mounted to a wall. In shopping language, “wall light,” “wall lamp,” and “sconce” overlap. They can serve ambient lighting, bedside reading, hallway navigation, vanity illumination, artwork accenting, and staircase safety.
Hardwired wall light
A wall light connected directly to the home’s electrical wiring, typically through an electrical box and controlled by a wall switch. Hardwired installation is not the same as hanging a picture frame. Wire connections and earthing must be safe and enclosed.
Plug-in wall light
A wall light that mounts to the wall but draws power from a socket via a cord. This is the easiest option when there is no wall wiring and the look of a cord (visible or covered with a channel) is acceptable.
Battery or rechargeable wall light
A wall light powered by batteries or a rechargeable module. Useful when no socket is nearby. Practitioners on Reddit report mixed feelings: some appreciate the easy installation, while others find the recharging routine annoying if the light runs daily.
Junction box / electrical box
The box inside or on the wall where wire connections are contained and the fixture is mounted. This is both a safety component and a structural support. According to This Old House, junction boxes house cable connections, help prevent electrical shock, and help contain sparks, while overstuffed boxes become fire hazards source.
Old-work box / cut-in box
An electrical box designed to be added to a finished wall. It clamps to the wallboard from behind. Community threads on DIY StackExchange frequently recommend old-work boxes when someone removes an old wall light and finds only loose wires coming through a hole.
Mounting bracket / mounting strap
The metal piece supplied with the light that attaches to the electrical box or wall surface. It supports the fixture body. Every major installation guide places bracket installation before attaching the fixture itself.
Canopy / backplate
The visible cover plate that hides the electrical box, wiring entry, and bracket. A practical buying point: the canopy must be large enough to cover the existing wall opening and any marks left by the old fixture.
Live / phase wire
The energized conductor carrying current to the fixture. Wire colors vary by country, fixture origin, and age of installation. This is a critical safety point covered in detail below.
Neutral wire
The return conductor in the circuit. Different guides assign different colors to neutral (blue in EU/UK, white in US, sometimes black in older Indian installations). Never assume. Test and verify.
Earth / ground wire
The safety conductor connected to the fixture body. It protects against electrical faults. If your home lacks an earth connection but the fixture requires one, consult a qualified electrician.
IP rating
Ingress Protection rating, indicating resistance to dust and water. It matters for bathroom, balcony, terrace, and outdoor wall lights. Philips recommends IP65 for fixtures directly above a bath or shower (Zone 1) and at least IP44 for the area just outside that zone source.
LED driver
The power supply unit for many integrated LED fixtures. If a wall light uses a separate driver, it needs to be placed somewhere concealed but accessible, with adequate ventilation.
Dimmable fixture
A fixture designed to work with a dimmer switch. The bulb, LED driver, and dimmer must all be compatible. Mismatched components cause flickering, buzzing, or premature failure.
Safety Rules for Indian Homes
Electrical work should not be trivialized. India has a formal electrical safety framework: the Central Electricity Authority lists the CEA (Measures relating to Safety and Electric Supply) Regulations, 2023 under its safety regulations source, and BIS maintains IS 732:2019 as the active code of practice for electrical wiring installations.
To understand the stakes: NFPA data from the US shows that electrical failure or malfunction contributed to roughly 80% of home fires involving electrical distribution and lighting equipment between 2015 and 2019 source. While those are US numbers, the physics of bad wiring does not change across borders.
Safety note: This guide helps you understand the process and make better decisions. If your wall light is hardwired, if there is no existing electrical box, if the wiring is old or unclear, if the fixture requires earthing, if the light goes in a bathroom or outdoor area, or if a new circuit or switch is needed, use a qualified electrician and follow local electrical rules.
Wire colors are not universal
This is one of the most dangerous assumptions in online installation guides. TCP’s EU/UK guide uses brown for live and blue for neutral. US guides use black for hot and white for neutral. Indian installations may use red for live and black for neutral in older or specification-based setups. Imported fixtures may follow yet another convention.
The rule: identify wires with proper testing and your fixture manual. Do not match colors based on a guide written for a different country.
Before You Buy a Wall Light
Choosing the right fixture before installation prevents returns, rework, and safety problems. Here is what to check.
Installation type. Decide whether you need hardwired, plug-in, or battery. If no existing wall point exists, either choose plug-in/battery or plan for electrician work first.
Canopy and backplate size. The backplate must cover the wall box, old marks, and wire opening. Seus Lighting specifically recommends checking canopy coverage before purchasing a replacement fixture.
Wall projection. For narrow hallways, choose shallow wall lights so the fixture does not become an obstacle or get bumped.
Fixture weight. Heavier fixtures need stronger anchoring and a box or bracket rated for the weight. One practitioner on a HomeImprovement thread advised adding blocking and a proper box whenever the new fixture could be heavier than the original.
Bulb type and wattage. Use only the bulb type and maximum wattage specified by the fixture manufacturer. Exceeding the rated wattage creates overheating risk.
Color temperature (CCT). Warm white (2700-3000K) suits bedrooms and living rooms. Neutral white (4000K) works for vanities and work areas. Cool white (5000-6500K) is usually too harsh for residential wall lighting.
Bathroom or balcony IP rating. Use fixtures rated for moisture exposure. Regulations vary, but the zone-based principle from Philips is a good starting point: closer to water means a higher IP value is required.
Dimming compatibility. If you plan to use a dimmer, confirm that the fixture, bulb, and dimmer are all compatible with each other.
For help matching fixture specs to your room, ALC Studio offers free design consultations to sort out size, finish, CCT, and placement before the electrician begins work.
Tools and Materials Checklist
What you need depends on the type of installation.
For mounting a plug-in or battery wall light
- Drill and appropriate bits (masonry bit for brick/concrete)
- Screwdriver
- Measuring tape
- Spirit level
- Pencil or marker
- Wall anchors or rawl plugs suited to the wall material
- Cable/pipe detector (check before drilling)
- Ladder or step stool
- Manufacturer’s installation manual
For replacing an existing hardwired wall light
All of the above, plus:
- Non-contact voltage tester
- Wire stripper
- Insulated gloves and safety glasses
- Screwdrivers (flathead and Phillips)
For adding a new hardwired wall light (electrician work)
This requires additional tools and expertise: fish tape, conduit, electrical boxes, wire connectors, switch hardware, and testing instruments. Leave this to a qualified electrician.
Where Should a Wall Light Be Installed?
The right height depends on the use case, not a single generic rule. A common starting range is 1.5 to 1.8 meters from the floor, but that is just a starting point.
Hallways
Mount at a consistent height for visual rhythm. TCP recommends spacing multiple wall lights 2 to 3 meters apart. LinkedIn lighting practitioners suggest 6 to 8 feet of spacing in corridors to maintain rhythm without over-lighting.
Keep projection shallow in narrow corridors so people do not brush against fixtures.
Bedside reading lights
Wrong height is one of the most common design regrets. Reddit users frequently complain about bedside sconces installed too high. The practical approach: sit on the bed in your normal reading position and place the light so the diffuser sits above shoulder height but does not shine directly into your eyes. One user reported that their bedside wall lights worked well at about 39 to 40 inches from the floor, but this varies with bed and mattress height.
For a deeper walkthrough of sconce placement, the sconce installation guide covers bedroom-specific scenarios in more detail.
Vanity and mirror lighting
Side-mounted wall lights near face height reduce the harsh shadows created by overhead lighting alone. Place lights on both sides of the mirror for balanced facial illumination rather than relying only on a single top light.
Staircases
Wall lights on staircases need careful height and beam direction to avoid glare. LinkedIn lighting practitioners emphasize that staircase lighting should be layered, with controlled beam angles that illuminate treads without blinding anyone walking up or down.
The “use decides height” framework
| Use case | Placement logic |
|---|---|
| Ambient wall glow | Eye level or slightly above, diffused shade, no exposed glare |
| Bedside reading | Seated shoulder or eye zone, beam reaches book, switch within reach |
| Hallway | Repeating rhythm, shallow projection, avoid glare at eye level |
| Vanity | Face-height side lighting, minimize top shadows |
| Bathroom or balcony | Placement plus IP rating, electrician-led installation |
| Artwork accent | Align with the object, control beam angle and hotspots |
Wall lights work best as part of a layered lighting plan, not as afterthoughts. If you are also considering pendants or ceiling fixtures, see lighting ideas for double-height ceilings for guidance on combining fixture types.
How to Replace an Existing Hardwired Wall Light: Step by Step
This section applies when a usable electrical box and working wiring already exist behind the old fixture. If that is not your situation, skip to the next section.
Important: If you are not confident working with electrical connections, hire an electrician even for a replacement.
Step 1: Switch off power at the breaker
Do not rely on the wall switch alone. Turn off the circuit at the breaker or fuse box. Seus Lighting warns that a wall switch can turn the lamp off while the junction box remains energized.
Step 2: Verify with a voltage tester
Use a non-contact voltage tester on the wires or box before touching anything. Every major installation guide includes this step. Skipping it is gambling with your safety.
Step 3: Remove the old fixture carefully
Support the old fixture while loosening screws so it does not hang from the wires. Take a photo of the existing wiring before disconnecting anything. Older boxes may have more than a simple two-wire setup, and a photo prevents confusion later.
Step 4: Inspect the box and wires
Check whether the electrical box is secure, whether conductors look burnt, cracked, or brittle, whether there is enough wire length to work with, and whether an earthing path exists. A new wall light should not be used to cover a bad box. If anything looks damaged, stop and call an electrician.
Step 5: Attach the mounting bracket
Use the bracket supplied with the new fixture. Check level before tightening. A crooked bracket is one of the most common reasons a wall light looks poorly installed.
Step 6: Connect wires according to the fixture manual
Match live to live, neutral to neutral, and earth to earth based on the manufacturer’s manual and what your electrician or testing has confirmed. Do not blindly follow color codes from an international guide.
Step 7: Tuck wires neatly into the box
Do not force the canopy shut over messy wires. Crowded boxes can create overheating. If the wires will not fold neatly, the bracket may be misaligned or the box may be too shallow.
Step 8: Secure the wall light
Align the fixture body with the bracket and tighten screws evenly. Avoid overtightening, especially on glass, ceramic, or delicate decorative fixtures.
Step 9: Install bulb, restore power, and test
Use the specified bulb type and wattage. Restore power at the breaker. Test the switch. Watch for flickering, buzzing, heat, wobble, or breaker trips. Any of those symptoms means something is wrong. Turn off power and investigate.
Adding a Wall Light Where No Wiring Exists
This is where many online guides fall short. If there is no existing electrical box and no wiring at the desired location, you are not “just installing a light.” You are doing electrical work.
The job may require:
- Locating existing conduit paths
- Chasing the wall for new conduit or wiring
- Running cable from the circuit to the new location
- Installing an electrical box
- Adding a switch point
- Drilling into masonry
- Patching, plastering, and painting
In Indian homes, walls are usually brick, concrete, or plastered masonry with concealed conduits, not hollow stud-frame construction. That means adding a new hardwired wall light is more involved than what US-based guides describe.
A junction box is not optional for hardwired connections. It contains the wire connections, reduces shock and fire risk, and provides structural support for the fixture.
Position this as electrician-led work. Do not simply drill a hole and pull a wire through. If you are planning new wall lights during a renovation or build, decide positions, wiring routes, driver locations, and switch placements before the walls are finished. Retrofitting into painted or tiled walls is always more expensive and messier.
Plug-In and Battery Wall Lights: When They Make Sense
Not every wall light needs to be hardwired. Plug-in and battery options solve real constraints without compromising on style.
Plug-in wall lights
A good choice when:
- The home is rented
- There is no existing wall wiring at the desired spot
- A visible or channel-covered cord is acceptable
- A socket is nearby
If you want a non-wired option for bedside use, a designer table lamp can also provide focused reading light without any wall work.
Battery and rechargeable wall lights
A good choice when:
- No socket is nearby
- Lighting is accent or occasional rather than daily task lighting
- Minimal wall disruption is the priority
In a DIYUK thread, users recommended rechargeable wall lights to avoid electrician costs, but one user cautioned that recharging becomes annoying quickly if the light runs for hours every evening.
Comparison table
| Option | Best for | Watch out for |
|---|---|---|
| Hardwired | Permanent luxury finish, no visible cords | Requires electrician, wall work, box and switch |
| Plug-in | Rentals, quick bedroom/reading lights | Visible cord, socket proximity, cable management |
| Battery/rechargeable | No-wiring accent lighting | Charging routine, lower brightness and runtime |
For decorative lighting without hardwiring, browse options like the Stello Lamp that offer a polished look with simpler setup.
Wall Material Matters
The wall must hold the fixture, and the wiring must power it safely. These are separate checks.
Brick, concrete, and plastered masonry
The standard for most Indian homes. Use masonry drill bits, wall plugs or anchors rated for the wall type, and a cable/pipe detector before drilling. Hidden conduits are common, and hitting one with a drill bit creates a serious hazard.
Drywall or gypsum partitions
Common in office interiors and some modern apartments. Use studs where possible for maximum stability. If no stud aligns with your fixture position, use hollow-wall anchors rated for the fixture weight.
Tile (bathroom or kitchen walls)
Use the correct tile drill bit to avoid cracking. Confirm the fixture’s IP rating suits the moisture zone. This is electrician territory.
Wood paneling
Wood screws can go directly into solid wood, but check heat clearance between the fixture and the panel, especially with higher-wattage bulbs. If you are also installing a mirror light in the bathroom, the LED mirror installation guide covers wall-type considerations for that scenario.
Bathroom, Balcony, and Outdoor Wall Lights
These locations carry extra risk because of moisture, splashes, and weather exposure.
Bathroom
Bathroom wall lights must be selected by moisture zone. The closer the fixture is to a water source, the higher the IP rating it needs. Philips’ bathroom safety guide breaks this into zones: Zone 1 (directly above bath or shower) requires IP65, while Zone 2 (the area surrounding the bath) requires at least IP44. Always use an electrician for bathroom wall light installation.
Balcony and terrace
Do not use indoor decorative wall lights in exposed balcony or terrace positions unless the product specs confirm outdoor or damp-rated suitability. Monsoon conditions bring splash, humidity, dust, and insects, making sealing and IP rating non-negotiable.
Outdoor walls
Use exterior-rated fixtures with weatherproof boxes, sealed cable entries, and proper drainage. Community discussions on home improvement forums consistently flag missing junction boxes and poor sealing as the top problems with outdoor sconce installations.
Common Wall Light Installation Mistakes
-
Turning off only the wall switch. The junction box can remain energized even with the switch off. Always isolate at the breaker.
-
Skipping voltage testing. Test before touching any wire. No exceptions.
-
Trusting wire colors from a foreign guide. Wire color conventions differ between India, the UK, and the US. Identify with a tester, not a color chart.
-
Mounting a hardwired fixture without a junction box. Loose wire splices behind a wall light are a fire and shock risk.
-
Using weak anchors in masonry or hollow walls. The wall material determines the anchor type and drill bit. Get this wrong and the fixture eventually pulls out of the wall.
-
Buying a fixture with a backplate too small for the existing opening. Measure the wall box and old fixture marks before ordering.
-
Ignoring earthing. If the fixture has an earth terminal and your home has no earth connection, consult an electrician rather than leaving it disconnected.
-
Exceeding the fixture’s maximum bulb wattage. This creates overheating and is a common cause of fixture damage.
-
Forcing the canopy shut. If the backplate will not sit flush, the wires may be poorly folded, the bracket may be misaligned, or the box may be too shallow.
-
Installing bathroom lights without checking IP rating. An indoor-rated fixture in a shower zone is dangerous.
Troubleshooting After Installation
| Symptom | Possible cause | What to do |
|---|---|---|
| Light does not turn on | Bulb not seated, breaker still off, loose connection | Turn power off before inspecting; call electrician if wiring is involved |
| Flickering | Loose bulb, loose wire connector, dimmer incompatibility | Stop use if persistent; this is a warning sign |
| Buzzing or humming | Dimmer mismatch, driver issue, loose connection | Turn off and have it checked professionally |
| Breaker trips when switched on | Short circuit, overload, wiring fault | Do not reset repeatedly; call an electrician |
| Fixture feels unusually hot | Wrong bulb wattage, poor ventilation, driver overload | Switch off and check manufacturer specs |
| Tingling sensation when touching | Earthing fault or current leakage | Stop using immediately and call an electrician |
| Fixture wobbles on the wall | Weak anchor, loose bracket, insufficient box support | Re-secure with correct hardware for the wall type |
If any symptom persists, do not ignore it. Electrical faults get worse, not better.
Installing Wall Lights in Indian Homes: What to Keep in Mind
Most international wall light installation guides assume US-style stud-frame walls or UK/EU wiring conventions. Indian homes are different in several important ways.
Masonry walls are the norm. Brick and concrete construction requires masonry bits, proper wall plugs, and more physical effort than drywall. Anchoring strength depends on drilling into solid masonry rather than mortar joints.
Concealed wiring is common. Electrical conduits run inside walls, often without visible indicators of their path. Always use a cable and pipe detector before drilling, especially near switch boards, electrical outlets, and known wiring routes.
Wire colors vary. Between imported fixtures, different eras of construction, and regional electrician practices, wire colors in an Indian home can follow several different conventions. Test and confirm with your electrician.
Earthing quality varies. Some older homes lack proper earthing. If your wall light has a metal body and an earth terminal, verify that the earth connection is functional. A qualified electrician can test this.
Bathroom and balcony conditions are harsher. Humidity during monsoon season, dust, and insects all make proper IP ratings and sealed fixtures more important than in drier climates.
Plan wall lights before finishing work. If you are building or renovating, decide wall light positions early. Wiring routes, junction boxes, LED driver placements, and switch locations should all be finalized before plastering, painting, paneling, or tiling.
Frequently Asked Questions
Can I install a wall light myself?
If you are mounting a plug-in or battery wall light, yes. It is mechanical work (drilling, anchoring, hanging). If you are replacing an existing hardwired fixture and feel confident with basic electrical safety (breaker isolation, voltage testing, wire identification), it is possible. But if wiring is unclear, old, or absent, or if a new circuit is needed, hire a qualified electrician.
Do I need an electrician to install a wall light in India?
For any new hardwired installation where wiring, conduit, or a junction box needs to be added, yes. For bathroom, balcony, and outdoor locations, yes. India has formal electrical safety regulations through the CEA, and BIS maintains IS 732:2019 as the wiring installation code of practice.
What is a junction box and why does a wall light need one?
A junction box is the enclosed container inside or on the wall where electrical wire connections are made. It prevents exposed splices, reduces shock risk, helps contain sparks, and provides a mounting surface for the fixture bracket. Hardwired wall lights need a junction box. Plug-in lights do not.
What height should bedside wall lights be?
There is no single correct answer because bed height and mattress thickness vary. The practical method: sit on the bed in your reading position and mark where the light should go so the diffuser is above your shoulder but not shining into your eyes. For many setups, this falls around 100 to 110 cm from the floor, but always measure your specific bed.
Can I install a wall light without drilling?
Some lightweight battery or adhesive-mount wall lights can attach without drilling. For anything heavier or hardwired, drilling is required to anchor the fixture securely. In brick or concrete walls, proper wall plugs and masonry bits are necessary.
What IP rating is needed for a bathroom wall light?
It depends on the fixture’s proximity to water. As a general guide, IP65 is recommended for Zone 1 (directly above the bath or shower) and at least IP44 for Zone 2 (the surrounding area). Always check local regulations and use an electrician for bathroom installations.
What if there is no junction box behind my old wall light?
This is a common problem. If you remove an old wall light and find only wires coming through a hole with no box, do not simply mount the new fixture over the hole. The connections need to be contained in a proper electrical box. An old-work or cut-in box can often be retrofitted into the wall, but this should be handled by an electrician who can assess the wall type, wire condition, and support requirements.
Why is my new wall light flickering?
Flickering usually points to a loose bulb, a loose wire connection, or an incompatible dimmer switch. If tightening the bulb does not fix it, turn off the power and have the connections inspected. Persistent flickering is a warning sign that should not be ignored.
Planning a wall light layout for a bedroom, hallway, vanity, or living room? Book a free consultation with ALC Studio to compare finishes, scale, and light temperature before the electrician begins work.
0 Comments
There are no comments for this article. Be the first one to leave a message!