
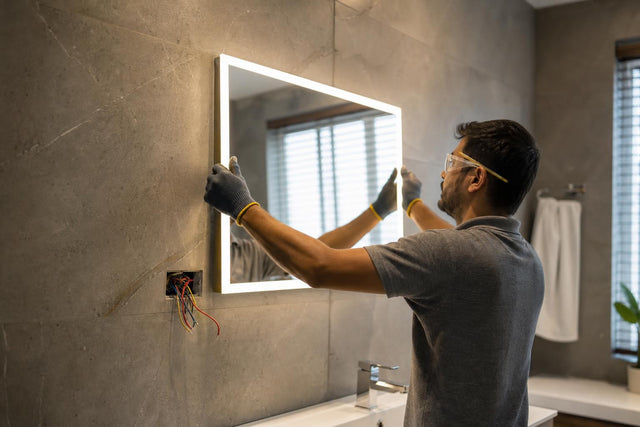
How to Install LED Mirror on Wall: 2026 Step-by-Step Guide
TLDR: Installing an LED mirror on a wall combines two jobs: secure wall mounting and safe electrical planning. Homeowners can handle measuring, marking, and bracket fixing, but hardwired electrical connections should go to a qualified electrician. For Indian homes, verify 230V/50Hz compatibility, plan the junction box location before tiling, and match wall anchors to your actual wall type (tile, brick, concrete, or partition). Always test every feature before the installer leaves.
Installing an LED mirror sounds simple until you realize it is not the same as hanging a picture frame. The mirror is heavy, it needs power, and if it goes in a bathroom, water and electricity are sharing the same small room. This guide covers the terms you will hear from electricians and product pages, the steps to get the mirror on the wall safely, and the mistakes that catch homeowners off guard.
Exploring illuminated mirrors? ALC Studio offers free design consultations to help with mirror and lighting selection before your electrician starts rough-in work.
What Does Installing an LED Mirror Actually Involve?
A standard mirror needs two things: a flat wall and secure anchors. An LED mirror needs those plus a power source, a driver, wiring connections, and often some form of electronic control (touch sensor, motion sensor, dimmer, or wall switch).
When the mirror goes into a bathroom, the requirements grow further. Bathrooms are classified as higher-risk electrical locations because the human body’s resistance drops significantly when wet, making shock hazards more serious. Schneider’s Electrical Installation Guide notes that bath and shower rooms require stricter precautions, referencing IEC 60364-7-701 for zone definitions.
The practical upshot: installing an LED mirror on a wall is really two parallel projects. One is mechanical (brackets, anchors, leveling), and the other is electrical (junction box, wiring, earthing, circuit protection). Both need to be right.
LED Mirror Installation Glossary
Before getting into the steps, here are the terms that come up constantly in product manuals, electrician conversations, and installation guides. Understanding them saves confusion later.
LED mirror: A mirror with integrated LED lighting, usually powered through a driver and controlled by a touch sensor, wall switch, or plug. It is both a mirror and an electrical fixture, so mounting and wiring must both be planned.
Hardwired LED mirror: A mirror connected directly to house wiring through a junction box rather than plugged into a visible socket. This gives the cleanest look but should be installed by a qualified electrician. Most installation guides consistently warn against DIY hardwiring.
Plug-in LED mirror: A mirror powered by a standard cord and plug. Easier for renters and anyone who wants a reversible installation, though the cord and outlet may remain visible unless planned carefully.
Junction box (electrical box): The protected enclosure where electrical connections are made. For hardwired LED mirrors, every wire connection must happen inside a proper box. Practitioners on Reddit report that exposed wire splices hidden behind a mirror (without a box) are one of the most common and dangerous installation failures.
LED driver: The component that converts mains AC power into low-voltage DC for the LED strips inside the mirror. It affects where power enters, how heat is managed, and whether dimming works correctly.
RCD / RCCB: Residual current device (also called residual current circuit breaker). It disconnects power when leakage current is detected. A PIB release regarding Tamil Nadu Electricity Regulatory Commission provisions describes 30 mA RCD protection as a life-saving measure for electrical shock prevention. Indian homeowners are more likely to encounter the term RCCB than the US equivalent, GFCI.
GFCI: The US/Canada term for ground-fault circuit-interrupter protection. Many online guides use this term. If you are in India, translate it to RCCB/RCD in your head and in conversations with your electrician.
IP rating: A two-digit code under IEC 60529 that describes how well an enclosure is protected against solids and water. In IP44, the first “4” means protection against solid objects of 1 mm and larger; the second “4” means protection against splashing water from any direction. IP44 does not mean waterproof.
CCT (Correlated Color Temperature): The warmth or coolness of light, measured in Kelvin. Lower numbers (2700K) feel warm and yellowish; higher numbers (5000K+) feel cool and bluish. ENERGY STAR guidance notes that 2700K to 3000K are preferred for most residential spaces.
CRI (Color Rendering Index): How accurately a light source shows colors compared to natural light. Higher CRI means truer colors. ENERGY STAR lists CRI 90 as the recommended target for bathrooms, which matters for shaving, makeup application, and skin tone accuracy.
Anti-fog / demister: A heating pad behind the mirror glass that prevents fogging after hot showers. It needs correct wiring and should be tested before the installation is signed off.
Mounting bracket / hanging profile: The metal bracket, cleat, or keyhole system that supports the mirror on the wall. It must be level, rated for the mirror’s weight, and matched to the wall type.
Wall anchor / wall plug: Hardware inserted into drilled holes to hold screws in masonry, tile, or plaster. The included anchors in the box may not suit every Indian wall. Always check.
Strain relief / cable clamp: A clamp that prevents the cable from pulling and stressing electrical connections after the mirror is mounted. Skip this and you risk loose wires over time.
Before You Buy or Drill: The 10-Point LED Mirror Checklist
This is where most installation headaches start, not at the drill, but at the purchase. Get these ten items confirmed before committing.
Voltage and frequency. India’s common domestic supply is 230V at 50Hz. Any LED mirror should be checked against this before installation. The BIS plug and socket guide confirms India’s standard voltage as 230 volts at 50 hertz.
Power type. Is the mirror plug-in, hardwired, or dual/convertible? This determines whether you need an electrician and what wall preparation is required.
Product manual. Read it before drilling anything. Check whether the manual permits hardwiring, plug-in use, horizontal or vertical mounting, and any wire modification.
IP rating. If the mirror goes in a bathroom, confirm the IP rating suits the splash zone. IP44 handles splashes but not direct shower jets.
Mirror size and weight. Confirm the wall can carry it. LED mirrors are heavier than standard mirrors because of the driver, frame, and lighting components.
Mounting hardware. Match anchors to your wall type: tile over brick, exposed concrete, plastered masonry, or gypsum partition. Do not assume the included anchors work on every wall.
Junction box location. Know where power exits the wall relative to where the mirror’s rear wiring box sits. This alignment is critical for hardwired installations.
Control method. Touch sensor, wall switch, handwave sensor, motion sensor, CCT selector, dimmer, or some combination. Each may need different wiring or switch planning.
Lighting quality. Check CCT and CRI. A CRI of 90 is a strong target for bathrooms where color accuracy matters.
Service access. Understand how the mirror lifts off, where the driver sits, and how warranty or service will work later.
Planning an illuminated mirror for your bathroom or vanity? ALC Studio’s free consultations can help you match mirror size, CCT, and controls to your space before your electrician begins.
Plug-in vs Hardwired LED Mirror: Which Installation Is Right?
This is the first fork in the road. The choice affects cost, complexity, and how the finished wall looks.
Plug-in mirrors are best for rentals, quick upgrades, bedrooms, dressing areas, and dry vanity zones with a nearby socket. The installation is simpler and reversible. The downside: a visible cord, unless the outlet is positioned behind or below the mirror.
Hardwired mirrors suit new bathrooms, renovations, luxury vanities, and hotel-style spaces. No visible cord, no dangling plug. The downside: it requires a correctly positioned junction box and a qualified electrician. Once a Reddit user bought a hardwired Artika mirror for a rental and then needed to convert it to plug-in because no junction box existed behind the wall. The lesson is simple: confirm your power setup before buying.
Dual or convertible mirrors offer flexibility, but read the manual carefully. Some vendors suggest cutting off the plug for hardwiring, which should not be done unless the product manual and an electrician both confirm it is allowed.
For a luxury finish, hardwired is usually the better-looking result. But it must be planned before tiling and final wall finishing.
Where Should the LED Mirror Sit on the Wall?
Height and alignment seem obvious until you get them wrong.
Center the mirror over the vanity basin, not randomly on the nearest wall. The mirror center should land near the eye level of the primary user. A commonly cited reference places the mirror center around 60 to 64 inches (roughly 150 to 163 cm) from the finished floor, with 4 to 6 inches of clearance above the faucet or backsplash. These numbers come from general bathroom design practice, not a rigid rule, so adjust for user height, vanity height, and mirror size.
For double vanities, decide between one wide mirror or two separate mirrors based on basin spacing and any wall-mounted lighting between them.
Check for conflicts before marking: taps, shelves, wall lamps, outlets, doors, towel rails, exhaust fans, and shower screens can all interfere. Indian bathrooms often have wall-mounted taps, geyser switches, exhaust wiring, and plumbing chases in unexpected spots. Ask your electrician, plumber, or interior contractor to mark all concealed services before anyone picks up a drill.
Where Should the Junction Box Go?
This single detail causes more installation failures than almost anything else.
For hardwired LED mirror installation, the junction box in the wall should sit behind the mirror, aligned with the mirror’s own wiring entry point or internal junction area. If the wall box conflicts with the mounting bracket, the driver housing, or the mirror frame, the mirror will not sit flat against the wall.
The correct sequence: get the mirror’s back-view diagram from the manufacturer, then position the wall box to match. Leave enough cable slack (at least 15 to 20 cm) so the electrician can make connections while the mirror is held near the wall. Secure all connections inside the box with proper connectors and strain relief so nothing pulls loose after mounting.
Practitioners on Reddit who install bathroom mirrors regularly emphasize that a short electrician visit during rough-in is far cheaper than patching, troubleshooting, and reinstalling later. One user on r/BathroomRemodeling noted that loose splices left behind a mirror without a proper junction box are both unsafe and a code violation.
Junction box placement worksheet (share this with your electrician and contractor):
Mirror width and height
Mounting orientation (horizontal or vertical)
Distance from mirror top to rear junction/driver area
Distance from mirror side to rear junction/driver area
Bracket location and type
Cable entry side
Switch method (touch, wall switch, motion)
Wall material and tile thickness
Final finished floor level (not raw slab level)
This pre-planning step is something almost no competing guide covers, and it prevents the most expensive mistakes.
Tools and Materials You May Need
Gather everything before starting. A missing tool mid-install means climbing down, leaving the mirror unsupported, or improvising badly.
Measuring tape
Pencil or marker
Spirit level or laser level
Drill with appropriate bits (tile bit, masonry bit, or wood bit depending on wall)
Screwdriver (Phillips and flat)
Wall plugs and anchors rated for your mirror’s weight and your wall type
Concealed-wire detector or stud finder (if applicable)
Voltage tester (non-contact type preferred)
Safety glasses and gloves
A helper (LED mirrors are heavy and awkward to hang alone)
Wire strippers, connectors, and terminal tools are for the electrician, not for homeowners doing DIY mounting.
For tile, concrete, and brick walls common in Indian homes, use masonry or tile-specific drill bits and anchors. Do not use hollow-wall (drywall) anchors on solid masonry.
Step-by-Step: How to Install an LED Mirror on a Wall
Step 1: Inspect the Mirror
Unbox carefully and check for glass damage, cracks, chipped edges, loose components, and missing accessories. Examine the back: locate the mounting points, bracket slots, wiring entry, driver housing, touch controls, and anti-fog pad if present. Read the manual completely.
Step 2: Turn Off Power and Verify
Switch off the circuit breaker for the bathroom or vanity area. Then use a voltage tester at the junction box or outlet to confirm the power is truly off. Do not rely on the wall switch alone. This is non-negotiable for any electrical work.
Step 3: Mark Height, Centerline, and Bracket Position
Find the vanity centerline and transfer it up the wall. Mark the mirror’s top and bottom edges at the desired height. Then measure the bracket offset (how far down from the mirror’s top edge the bracket hooks sit) and mark the bracket’s screw holes. Use a spirit level to confirm the marks are perfectly horizontal.
One detail many guides skip: the bracket position is not the same as the mirror position. If the bracket hooks sit 8 cm below the mirror’s top edge, your bracket screw holes need to be 8 cm lower than where you want the mirror’s top edge. Getting this wrong means a crooked or misaligned mirror.
Step 4: Confirm Wall Type and Hidden Services
Before drilling, identify the wall material. Tile over brick needs a tile bit first and then a masonry bit. Solid concrete needs a hammer drill with a masonry bit. Gypsum partition walls may need toggle bolts or backing support for heavy mirrors. NISSIYA’s installation guide specifically warns that different wall types require different mounting hardware.
Scan for concealed plumbing, electrical conduits, and reinforcement before drilling. Hitting a water pipe behind bathroom tile is expensive and disruptive.
Step 5: Drill and Install Bracket
Drill pilot holes slowly, especially through tile (use low speed, no hammer mode, and steady pressure to avoid cracking). Insert wall anchors rated for the mirror’s weight. Fasten the bracket firmly and double-check level. A bracket that is off by 2 mm will show as a visible tilt across a wide mirror.
Step 6: Have the Electrician Make Hardwired Connections
For hardwired mirrors, a qualified electrician should connect live, neutral, and earth wires according to the product manual and local wiring standards. Connections go inside the junction box with proper connectors and strain relief. India follows the BIS-listed IS 732:2019 as a code of practice for wiring installations, but your electrician should verify compliance with applicable local regulations.
For plug-in mirrors, simply route the cord to a nearby outlet. If the outlet needs to be added or relocated, that is still an electrician’s job.
Step 7: Hang the Mirror
With a helper, carefully lift the mirror and hook it onto the bracket. Avoid pinching wires between the mirror and the wall. Check that the mirror sits flat, is level, and does not wobble. Forum users on hardware communities report that uneven walls can leave gaps at the bottom of the mirror. If the wall is not square, adjust screw depth or add small support pads behind the mirror before final positioning.
Step 8: Test Every Feature
Turn the breaker back on. Test: LED light on/off, dimming (if available), CCT switching, touch sensor response, handwave or motion sensor, anti-fog/demister function, and wall switch behavior. Look for flickering, uneven illumination, dead spots, and sensor lag. Do this before the electrician leaves.
Step 9: Clean and Document
Wipe the mirror with a soft, lint-free cloth. Avoid harsh chemicals or abrasive cleaners. Store the manual and warranty card. Photograph the back wiring and junction box before any final covers go on. This documentation helps if you need service later.
Bathroom Safety: IP Rating, RCCB/RCD, Earthing, and Wet Zones
Bathrooms deserve their own safety section because the risks are real.
IP ratings are not a blanket guarantee. IP44 means the mirror is protected against splashing water from any direction. It does not mean the mirror can handle direct shower spray, water jets, or immersion. Check the exact bathroom location where the mirror will hang, and confirm the IP rating is suitable for that zone.
RCCB/RCD protection matters. In wet environments, a residual current device can detect leakage current and cut power before a shock becomes fatal. Ask your electrician whether your bathroom circuit has 30 mA RCCB/RCD protection and proper earthing.
Do not install switches, sockets, or unprotected connections inside wet zones unless local code and the product’s IP rating specifically permit it. Bathroom zone classifications (based on standards like IEC 60364-7-701) define how close electrical equipment can be to water sources.
In India, ask your electrician to verify the bathroom circuit, earthing, RCCB/RCD protection, switch location, and product suitability against applicable local rules and standards. This article is educational guidance, not a substitute for professional electrical assessment.
Wall Type Guide for Indian Homes
Most international LED mirror guides assume drywall and timber studs. Indian homes are different.
Tiled bathroom walls are the most common scenario. Drill through the tile first with a tile bit at low speed, then switch to a masonry bit for the substrate behind it. Seal drill holes if your contractor requires it for waterproofing integrity.
Brick or plastered masonry walls are forgiving for anchors but dusty to drill. Use masonry wall plugs sized for the mirror’s weight. Blow dust out of holes before inserting anchors.
Concrete walls (common in apartments and newer construction) require a hammer drill and proper masonry bits. Check for reinforcement bars before drilling. These walls hold anchors extremely well once drilled correctly.
Gypsum or partition walls are increasingly common in modern Indian interiors. Heavy LED mirrors may need backing board, plywood reinforcement, or structural support behind the partition. Hollow-wall toggle bolts can work for lighter mirrors, but relying only on them for a 15 kg mirror is risky.
Uneven walls are more common than people expect. Test-fit the mirror before final wiring. If the mirror rocks or leaves a gap at the bottom, adjust screw depth, add support packing, or have the wall surface corrected before declaring the install complete.
Lighting Quality: CCT, CRI, and Why Mirror Light May Not Be Enough
An LED mirror improves face-level grooming light, but it is usually not enough to be your only bathroom light source.
A practitioner FAQ on LinkedIn states clearly that LED mirror light is diffuse, aimed at the person looking into the mirror, and not designed as the room’s main illumination. The recommendation: use ceiling lighting for overall room brightness, the LED mirror for face-level task light, and optional wall lamps for ambiance and shadow control.
For the mirror itself, CCT and CRI determine how useful the light actually is. Warmer light (2700K to 3000K) feels cozy and flattering. Neutral light (4000K) works well for grooming accuracy. Cooler light (5000K+) can feel harsh in a bathroom but shows detail clearly. CRI 90 or higher is worth seeking for any mirror used for makeup, shaving, or skincare.
If you are planning layered bathroom lighting, consider adding wall lights alongside the mirror. The Caral wall light is one example of vanity-adjacent lighting that complements a mirror’s task light with softer ambient coverage.
For broader lighting design across rooms, ALC Studio’s guide on lighting ideas for double-height spaces covers layering principles that apply to bathrooms as well.
Common LED Mirror Installation Mistakes
These are the errors that surface repeatedly in practitioner discussions, community threads, and installation guides.
1. Buying before checking voltage and wiring type. Indian homes run on 230V/50Hz. Importing a mirror rated for 110V without a compatible driver means it will not work, or worse, it could be damaged on first power-up.
2. Leaving exposed wire splices behind the mirror. This is surprisingly common. Practitioners on Reddit’s r/HomeImprovement consistently push back on installations where wire connections are left loose behind the glass without a junction box. Every connection should be inside a proper box with approved connectors.
3. Putting the junction box in the wrong place. If the wall box conflicts with the driver, bracket, or frame, the mirror will not sit flat. One Reddit thread about installing a large LED mirror on tile showed cost quotes ranging from $150 to $1,150, largely because of hidden variables like junction box relocation and tile repair.
4. Using the wrong anchors. The small plastic anchors included with many mirrors are designed for drywall. They may pull out of Indian masonry if the mirror is heavy. Match anchors to both wall type and mirror weight.
5. Treating IP44 as waterproof. IP44 means splash protection. It does not mean you can mount the mirror inside a shower enclosure or aim a handheld shower at it.
6. Relying on the LED mirror as the only bathroom light. Mirror LEDs provide task lighting for the face, not general room illumination. Plan ceiling or wall lighting separately.
7. Ignoring wall flatness. One forum user installed an LED mirror that hung from two screws but left a visible gap at the bottom because the wall was not plumb. Always test-fit before final wiring.
8. Skipping final feature testing. Test the LED, CCT mode, dimming, anti-fog, touch sensor, and wall switch before the electrician leaves. Fixing a wiring issue after the mirror is sealed and the contractor has gone costs far more.
Troubleshooting After Installation
Problem |
Likely Cause |
What to Check |
|---|---|---|
Mirror does not turn on |
Breaker off, wall switch off, loose connection, failed driver |
Have electrician check breaker, wall switch, line/neutral/earth connections, and driver |
Mirror flickers |
Loose connection, incompatible dimmer, driver fault |
Confirm wiring tightness and dimmer compatibility with electrician |
Touch sensor is unpredictable |
Power supply issue, moisture, earthing problem |
Test after mirror dries; contact product support if persistent |
Anti-fog does not work |
Feature not wired or activated, faulty demister |
Verify wiring and activation; test before final sign-off |
Mirror is crooked |
Bracket not level, holes mismeasured |
Recheck bracket level and screw positions |
Mirror does not sit flat |
Junction box protrudes, uneven wall, wires pinched |
Check wire clearance and wall surface; adjust support |
Visible cable |
Plug-in mirror with poorly placed outlet |
Consider relocating outlet behind mirror (electrician required) |
When to Call an Electrician
Some parts of LED mirror installation are safe for a competent homeowner: measuring, marking, drilling, fixing brackets, and hanging. But certain tasks should not be DIY projects.
Call a qualified electrician if:
The mirror is hardwired
You need to add, move, or replace a junction box
You need a new bathroom circuit, switch, or outlet
Existing wiring is old, shared with other circuits, ungrounded, or unclear
The wall is tiled and you are unsure of the wiring route behind the tiles
You need to verify or install RCCB/RCD protection and proper earthing
You see exposed wires, loose splices, heat marks, moisture ingress, or flickering after installation
A practitioner on Reddit who claims frequent bathroom mirror installation experience put it well: a short electrician visit can prevent patching, troubleshooting, and reinstalling later. Bathrooms have stricter requirements, LED mirrors are heavier than standard mirrors, and loose splices behind a mirror without a proper box are never acceptable.
For lighting and mirror selection before the install begins, ALC Studio offers free design consultations and ships illuminated mirrors pan-India with dispatch within three working days on ready products.
Frequently Asked Questions
Can I install an LED mirror myself?
You can handle basic wall mounting if you are comfortable with measuring, drilling, and using anchors. For hardwired electrical connections, moving a junction box, or modifying bathroom circuits, always use a qualified electrician. The mechanical part is DIY-friendly; the electrical part is not for most homeowners.
Do LED mirrors need an electrician?
Plug-in mirrors may not need an electrician if a safe outlet already exists nearby and mounting is straightforward. Hardwired mirrors should be connected by a qualified electrician. If you need a new outlet, circuit, or junction box, that also requires professional electrical work.
Where should the junction box go for an LED mirror?
Behind the mirror, aligned with the mirror’s own wiring entry or junction area, and positioned so the mirror sits flat with no wire pinch. Get the manufacturer’s back-view diagram before electrical rough-in or tiling.
How high should an LED mirror be?
A common reference is mirror center near eye level, roughly 150 to 163 cm (60 to 64 inches) from the finished floor, with 10 to 15 cm of clearance above the faucet or backsplash. Adjust for your height, vanity dimensions, and mirror size.
Can I install an LED mirror on tile?
Yes. Use the correct tile drill bit at low speed without hammer mode to avoid cracking. Switch to a masonry bit once through the tile. Avoid hidden plumbing and electrical lines, and use anchors suited to the substrate behind the tile, not just the tile itself.
Is IP44 enough for a bathroom LED mirror?
IP44 handles splashing water from any direction, which suits many bathroom vanity areas. It is not suitable for direct shower spray, water jets, or immersion. Check the exact location and local regulations before deciding.
Can I use an LED mirror as the only bathroom light?
Usually not ideal. LED mirrors provide face-level task light, not full-room illumination. Pair the mirror with ceiling lighting for ambient brightness and, optionally, wall lamps for warmth and shadow control.
What should I tell my electrician before installation?
Give them the mirror’s dimensions, back-view wiring diagram, power type (plug-in or hardwired), voltage rating, control method, desired mounting height, wall material, tile thickness, switch location preference, and whether the mirror includes anti-fog, CCT switching, dimming, or motion sensors. The more information upfront, the fewer surprises on installation day.
Getting the mirror and lighting choices right before installation starts is half the battle. If you are planning a bathroom upgrade or vanity lighting scheme, explore premium lighting options or browse coordinated fixtures like the Toronto to build a complete lighting plan that works with your LED mirror, not against it.
0 Comments
There are no comments for this article. Be the first one to leave a message!