
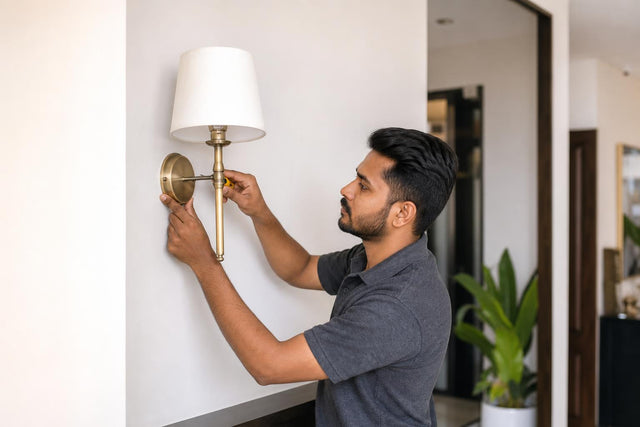
How to Install Sconces in India: 2026 Step-by-Step Guide
TL;DR
Installing sconces comes down to three methods: hardwired (permanent, cleanest look, requires an electrician in India), plug-in (near an outlet, DIY-friendly), and wireless/battery (renter-friendly but limited brightness). Standard mounting height is 60 to 66 inches from the floor for most rooms. Indian homes run on 220-240V with different wire colour codes than US guides assume, so hiring a licensed electrician for any hardwired work is strongly recommended.
Sconces transform flat, overhead-lit rooms into spaces with depth and warmth. But the gap between picking a beautiful wall light and actually getting it on the wall stops a lot of people. Most installation guides online are written for American homes with drywall, 120V circuits, and different wire colours. If you live in India, following those instructions without adaptation can be confusing at best and dangerous at worst.
This guide covers everything you need to know about how to install sconces in Indian homes, from choosing the right type to mounting heights, wiring standards, and when to call a professional.
Exploring wall lights for your project? Browse options like the Caral Wall Light to get a sense of modern sconce styles before planning your installation.
What Is a Sconce?
A wall sconce is a light fixture mounted directly to the wall. Unlike a pendant or chandelier that hangs from the ceiling, a sconce projects light outward, upward, or downward from the wall surface. The result is softer, more layered illumination than what a single ceiling light provides.
Sconce vs. Wall Light vs. Wall Lamp
These terms get used interchangeably, and honestly, that’s fine for most purposes. If you want to get technical: a “wall sconce” traditionally refers to a fixture with an exposed light source, while a “wall light” has the source covered (usually by glass or a shade). A “wall lamp” tends to describe a functional fixture, often with a swing arm for reading. In practice, manufacturers and retailers rarely maintain these distinctions. When shopping, focus on the fixture’s function and form rather than the label.
Types of Wall Sconces
Uplight sconces direct light toward the ceiling, creating ambient glow. Downlight sconces push light downward, useful for task areas or highlighting wall textures. Swing-arm sconces extend outward on an adjustable arm, making them ideal for bedside reading. Candle-style sconces mimic traditional candelabras and suit classical or transitional interiors. Picture lights mount above artwork to illuminate it. Flush-mount wall lights sit tight against the wall with a minimal profile, fitting well in hallways and narrow spaces.
For bedrooms, a swing-arm or adjustable sconce like the Kobe wall light works well for reading without disturbing a partner. In living rooms and hallways, uplighting or flush-mount styles tend to create the best atmosphere.
Three Ways to Install a Sconce
Before you buy a sconce, understand which installation method suits your situation. The method determines the tools you need, whether you can do it yourself, and how the finished result will look.
Method |
Difficulty |
Permanence |
Best For |
|---|---|---|---|
Hardwired |
Moderate to high |
Permanent |
Owned homes, new construction, renovations |
Plug-in |
Easy |
Semi-permanent |
Renters, rooms near outlets, quick upgrades |
Wireless/Battery |
Very easy |
Temporary |
Accent lighting, rentals, spaces without wiring |
Hardwired Installation
A hardwired sconce connects directly to your home’s electrical wiring inside the wall. The fixture is controlled by a wall switch, and there are no visible cords. This is the cleanest, most professional-looking result.
The tradeoff: it requires a junction box, proper wiring, and (in India) a licensed electrician. Indian homes run on 220-240V, which is double the voltage of American homes. This higher voltage means mistakes carry greater risk of shock or fire. Designer wall lamps like the Prato look their best when hardwired, with no cords to distract from the design.
Plug-In Installation
A plug-in sconce has a power cord that runs from the fixture to a standard wall outlet. You mount the fixture with screws, plug it in, and you’re done. Installation takes under an hour and costs almost nothing in labour.
The downside is visibility. Unless you run the cord through a cord cover or behind furniture, it will be on display. Placement also depends on proximity to an outlet. Plug-in sconces work well in bedrooms, reading nooks, and rental apartments where you cannot modify wiring.
Wireless and Battery-Powered
This approach skips electrical connections entirely. You mount the sconce body to the wall with screws or adhesive, then use rechargeable LED puck lights or battery-powered bulbs as the light source. It is the easiest method for renters or anyone who wants sconces in a spot with no wiring.
There is a catch, though. Practitioners in online forums and YouTube comments frequently report that the popular “puck light inside a sconce” hack has real limitations. One commenter noted that puck lights produce visible circular shadows inside the shade and that the light output is not bright enough for evening reading. This approach works for accent lighting and ambiance, but do not count on it for task lighting.
Tools and Materials You Need
For a hardwired installation (which your electrician will handle in most Indian homes), the typical list includes:
Non-contact voltage tester
Screwdriver set (flat and Phillips)
Drill with masonry bits (for brick/plaster walls)
Spirit level
Pencil and tape measure
Wall anchors (heavy-duty for brick/concrete)
Mounting bracket (usually included with the fixture)
Wire connectors
Electrical tape
For plug-in or wireless installations, you only need a drill, level, pencil, wall anchors, and screws.
A note on Indian walls: Most Indian homes are built with brick and plaster, not the drywall common in American construction. This means you will need masonry drill bits and appropriate wall anchors. Plaster can crumble if you drill too aggressively, so pre-drilling pilot holes is important. Older homes with lath and plaster are particularly tricky. A stud finder may not work reliably on solid brick walls, but it can help locate conduit runs that you want to avoid.
Step-by-Step Hardwired Installation
This section outlines the standard process. In India, because of the 220-240V supply and brick/plaster construction, professional installation is strongly recommended. Use this as a reference to understand what your electrician will do and to prepare the space beforehand.
Step 1: Turn Off Power at the MCB
Go to your main distribution board (the MCB/breaker panel, not just the room’s wall switch) and turn off the circuit feeding the area where the sconce will go. The wall switch alone is not reliable protection because the junction box can still have live power running to it.
Step 2: Verify with a Voltage Tester
Even with the breaker off, test every wire in the box with a non-contact voltage tester before touching anything. Check each wire individually. Older homes and shared circuits can surprise you.
Step 3: Mount or Confirm the Junction Box
If you are replacing an existing fixture, the junction box should already be in place. If you are installing from scratch, your electrician will need to install a new junction box and run wire to it from the nearest circuit.
One common issue that comes up in practitioner forums: junction box orientation matters. A homeowner on a DIY forum described their electrician installing a vertically oriented rectangular box for a sconce, then discovering the mounting bracket did not align. Always check the sconce manufacturer’s instructions for box requirements before the electrician installs or repositions the box.
Step 4: Connect the Wires
In Indian wiring (per BIS standards), the colour codes are:
Red = Live (equivalent to “hot” in US guides)
Black = Neutral
Green or Green/Yellow striped = Earth (ground)
This is different from US standards, where black is hot and white is neutral. If you are following an American guide, do not match colours blindly. Connect red to the fixture’s live wire, black to neutral, and green/yellow to the earth terminal or green screw on the mounting bracket.
Step 5: Secure the Fixture
Attach the mounting bracket to the junction box. Then connect the fixture body to the bracket per the manufacturer’s instructions. Install the bulb and any shade or diffuser.
Step 6: Restore Power and Test
Turn the MCB back on. Flip the wall switch. If the light works, the installation is complete. If it does not, turn power off again and check all connections.
Ideal Sconce Height by Room
Getting the height wrong is one of the most visible installation mistakes. Wall sconces sit at eye level, so even small errors create glare, unflattering shadows, or an unbalanced wall. Here are the standard mounting heights measured from the floor to the centre of the fixture.
Room |
Height from Floor |
Notes |
|---|---|---|
Hallway |
60 to 66 inches |
The universal baseline for most situations |
Bedroom (reading) |
30 to 36 inches above the top of the mattress |
Measure from the mattress, not the floor |
Bathroom (flanking vanity mirror) |
60 to 65 inches |
Should land around eye level to avoid harsh shadows |
Bathroom (above mirror) |
75 to 80 inches |
Used when flanking is not possible |
Living room (flanking fireplace or art) |
66 to 72 inches |
Symmetry matters here |
Entryway or foyer |
66 to 72 inches (up to 78 inches in double-height foyers) |
Scale to ceiling height |
Hallway spacing |
6 to 8 feet apart |
For even illumination down the corridor |
For Indian homes with double-height living rooms (common in newer apartments and villas), sconces may need to go up to 72 to 78 inches for proportional balance. If you are working with high ceilings, our guide on lighting for double-height ceilings covers placement principles in more detail.
A clean, minimal sconce like the Stealth works well in hallways and bedrooms where you want the fixture to blend rather than dominate.
Choosing the Right Sconce Before Installation
Most installation guides skip this step entirely, jumping straight to tools and wiring. But picking the wrong fixture is one of the most common mistakes.
Each room needs a different level of illumination, beam angle, and sometimes a different material or IP rating. A sconce that looks stunning in a living room photo may be completely wrong for your bathroom. Before you drill a single hole, consider:
Function first. Is this for ambient lighting, task lighting (reading), or accent lighting (highlighting art)? Ambient sconces should cast wide, soft light. Task sconces need focused, adjustable beams. Accent sconces can be decorative with minimal output.
Size relative to the wall. A large sconce on a narrow hallway wall will feel overwhelming. A tiny sconce flanking a king-sized bed will look lost. Use the wall dimensions to guide your choice.
CCT (Correlated Colour Temperature). This is measured in Kelvin. Warm white (2700K to 3000K) creates a cozy feel and works well in bedrooms and living rooms. Neutral white (3500K to 4000K) is better for bathrooms and workspaces. The Trieste wall lamp is one example where checking the product specs for CCT helps you confirm it suits the room you have in mind.
IP rating for wet areas. This is critical and widely overlooked. More on this below.
IP Ratings: What They Mean and Why They Matter
IP stands for Ingress Protection. The two-digit number tells you how well a fixture resists dust (first digit) and water (second digit). For sconce installation, the water rating is the one that matters most.
IP20 — Protected against solid objects larger than 12mm, no water protection. Suitable for dry indoor areas only (bedrooms, living rooms, hallways).
IP44 — Protected against splashing water from any direction. The minimum for bathroom installations, covered outdoor areas, and anywhere humidity is common.
IP65 — Protected against water jets. Suitable for fully exposed outdoor installations and wet areas.
If you are installing a sconce in a bathroom or near a kitchen sink, check that the fixture is rated IP44 or higher. A dry-rated fixture in a humid environment will corrode, short-circuit, or fail prematurely.
For bathroom vanity areas, consider pairing sconces with ALC Studio’s illuminated mirrors, many of which carry a 5-year warranty for use in wet environments.
Common Installation Mistakes to Avoid
1. Skipping the voltage test. This is the most dangerous mistake. Even if you think the power is off, electricity might still run through the wires. Always verify with a voltage tester.
2. Misconnecting wires. Swapping live and neutral, or forgetting the earth connection, can cause short circuits or make the fixture unsafe. In India, remember: red is live, black is neutral, green/yellow is earth.
3. Mounting on a weak surface without anchors. Indian walls are mostly brick and plaster, which is actually strong, but the plaster layer can crumble. Use the right wall anchors for your wall type. If you are mounting a heavier sconce (some designer fixtures weigh 2 to 3 kg), toggle bolts or expansion anchors are essential.
4. Installing at the wrong height. Because sconces are at eye level, even a 2-inch error is noticeable. Measure carefully using the room-specific guidelines above.
5. Choosing the wrong fixture for the room. Selecting a sconce based solely on appearance without considering brightness, beam angle, or moisture rating leads to poor results. A fixture like the Clay wall lamp might be perfect for a dry living room but inappropriate for a shower-adjacent bathroom wall.
6. Forgetting to plan the switch location. If you are adding a new hardwired sconce, decide where the switch will go before any wiring starts. Retrofitting a switch after the fact means opening up more wall.
When to Hire a Professional Electrician
For Indian homeowners, the short answer is: always, for hardwired installations.
Here is why. India’s 220-240V supply carries roughly twice the energy of a US 120V system. A wiring mistake that might trip a breaker in an American home could cause serious injury or fire in an Indian one. Add to that the prevalence of brick and plaster walls (harder to work with than drywall), concealed conduit runs, and the occasional absence of proper earthing in older buildings, and the case for professional installation becomes clear.
Hire a licensed electrician when:
You are installing a new sconce where no wiring currently exists
The installation is in a bathroom, kitchen, or outdoor area
You need to add a new circuit or switch
Your home has old or questionable wiring
You are unsure about the existing junction box orientation or condition
A moderately handy homeowner on a home-improvement forum captured the typical mindset well: “I have some experience working with electric wiring (changing switches and that sort of thing), but this will be my most ambitious undertaking.” If that sounds like you, there is no shame in having an electrician handle the wiring while you choose the fixture and plan the placement.
ALC Studio offers free design consultations to help you plan fixture placement, sizing, and style before the electrician arrives. Explore ALC Studio’s collection to get started.
Installation Costs: What to Expect
Cost benchmarks vary significantly by region and complexity. Here are some reference points:
Simple fixture swap (existing junction box and wiring): Primarily labour cost. In Indian metros, expect to pay an electrician Rs. 500 to Rs. 1,500 per fixture depending on complexity and the electrician’s rates.
New wiring from scratch: This involves running cable through walls, installing a junction box, and possibly adding a switch. In the US, this can push total costs to $500 to $800+ per fixture according to Angi’s cost data. Indian costs are generally lower for labour but vary widely.
Plug-in or wireless installation: Essentially free if you do it yourself. The only cost is the fixture and (for plug-in) a cord cover if you want to hide the cable.
Electrician hourly rates (US benchmark): $50 to $150 per hour with minimum service fees of $75 to $200. Indian electricians typically charge less, but always get a quote before work begins.
Installation time for a straightforward hardwired sconce is 1 to 2 hours per fixture.
Glossary of Key Terms
Junction box (also called an electrical box or switch box): A metal or plastic box recessed into the wall where electrical wires meet and connect. Every hardwired sconce must attach to a junction box. The box provides a safe enclosure for wire connections and a mounting surface for the fixture’s bracket.
Mounting bracket (also called a crossbar or mounting plate): The metal piece that screws into the junction box. The sconce body then attaches to this bracket. Most fixtures include one in the box.
Wire nut (wire connector): A small, twist-on cap used to join two or more wires together securely. In India, you may also see screw-type terminal connectors or push-fit connectors depending on the fixture.
MCB (Miniature Circuit Breaker): The Indian equivalent of a circuit breaker. Located in your home’s distribution board. Always turn off the relevant MCB before any electrical work.
CCT (Correlated Colour Temperature): Measured in Kelvin (K). Describes the colour appearance of light. Lower numbers (2700K) produce warm, yellowish light. Higher numbers (4000K to 5000K) produce cooler, bluish-white light. For sconces, warm white (2700K to 3000K) is the most popular choice in bedrooms and living spaces.
IP Rating (Ingress Protection): A two-digit code indicating dust and water resistance. IP20 means indoor/dry use only. IP44 means splash-proof, suitable for bathrooms. IP65 means water-jet resistant, suitable for exposed outdoor use.
Hardwired: A fixture that connects permanently to your home’s electrical system through wires inside the wall. No plug, no cord.
Lumen: A measure of total light output. More lumens means brighter light. For a sconce providing ambient light, 200 to 400 lumens per fixture is typical. For task lighting (reading), look for 400 to 800 lumens.
Frequently Asked Questions
Do sconces need a wall switch?
Hardwired sconces are typically connected to a wall switch. Plug-in sconces can use an inline cord switch or a smart plug for remote control. Wireless/battery sconces usually have a small switch on the fixture itself or come with a remote.
Can I convert a plug-in sconce to hardwired?
Yes, but it involves removing the plug, routing the cord wires into a junction box, and making proper electrical connections. This should be done by a licensed electrician, especially in Indian homes running on 220-240V.
How do I install sconces on brick or plaster walls?
Use a drill with a masonry bit. Pre-drill pilot holes to prevent the plaster from crumbling. Insert appropriate wall anchors (plastic expansion anchors for lighter fixtures, metal toggle or expansion bolts for heavier ones) before driving screws. Avoid hammer drills on thin plaster, as the vibration can cause cracks.
What if my junction box is oriented the wrong way?
This is more common than you might think. Some sconces require a horizontally oriented box, others need vertical. If your existing box does not match the mounting bracket, an electrician can reposition or replace it. Always check the fixture’s installation instructions before the box goes in.
Can I install sconces without an existing junction box?
For hardwired sconces, no. A junction box is required by electrical code for safety. An electrician can install one by cutting into the wall and running wiring from a nearby circuit. For plug-in or wireless sconces, no junction box is needed.
What is the best colour temperature for bedroom sconces?
Warm white, in the range of 2700K to 3000K. This produces a relaxed, golden tone that supports sleep. Avoid cool white (5000K+) in bedrooms as it mimics daylight and can interfere with your body’s wind-down process.
How far apart should I space sconces in a hallway?
Six to eight feet is the standard recommendation for most residential hallways. Wider spacing (up to 10 feet) works if the sconces have a broader light throw. Narrower hallways may only need fixtures on one side.
Do I need an electrician for plug-in sconces?
No. Plug-in installation is a straightforward DIY job. You mount the bracket to the wall with screws and anchors, attach the fixture, and plug the cord into a nearby outlet. The only tool skills required are basic drilling and leveling.
Planning a sconce installation for your home? ALC Studio offers free design consultations to help you choose the right fixtures, plan placement, and coordinate with your electrician. Browse the full wall lighting collection to find the right fit for your space.
0 Comments
There are no comments for this article. Be the first one to leave a message!