
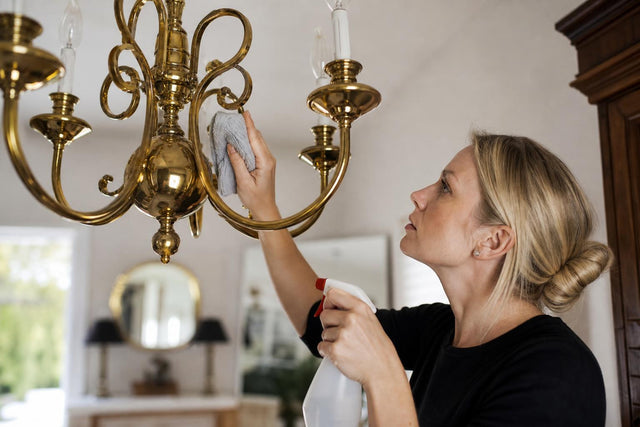
How to Clean a Brass Chandelier Without Taking It Down, 2026
TL;DR
You can clean a brass chandelier without taking it down using simple household ingredients, but you must first identify whether your brass is lacquered or unlacquered because the wrong method will damage the finish permanently. Lacquered brass only tolerates mild soap and water. Unlacquered brass can handle stronger solutions like vinegar and salt, lemon and baking soda, or even ketchup and tamarind paste. Always turn off the power at the circuit breaker, dust thoroughly before applying any liquid, and dry every surface immediately after cleaning.
Why Brass Chandeliers Need Special Attention
Brass is an alloy of copper and zinc. That copper content is what gives brass its warm, golden glow, but it’s also what makes brass reactive. Expose it to air, moisture, and pollutants, and it oxidises. The surface darkens. Spots appear. In severe cases, a green crust called verdigris forms.
This process accelerates dramatically in humid climates. If you live in coastal Mumbai, the salt air speeds up the formation of greenish verdigris. In polluted urban areas like Delhi, sulfur compounds in the air push tarnish rates even higher. Dry regions like Jaipur get more time between cleanings, but no brass fixture is immune.
The good news: learning how to clean a brass chandelier without taking it down is straightforward once you understand what type of brass you’re working with. Most people skip this step and jump straight to scrubbing, which is exactly how finishes get ruined.
If you’re still choosing the right fixture for your space, browse ALC Studio’s chandelier collection for options designed for Indian homes.
Key Terms You Need to Know Before Cleaning
Before you touch a single cloth to your chandelier, get familiar with these concepts. Skipping this section is the number one reason people damage their brass fixtures.
Solid Brass vs. Brass-Plated
Not all brass chandeliers are actually made of solid brass. Many are brass-plated, meaning a thin layer of brass sits over steel or cast iron. The distinction matters because plated brass can’t withstand aggressive cleaning without the plating wearing through.
The magnet test: Hold a small magnet to an inconspicuous part of the fixture. If it sticks, the chandelier is brass-plated over a magnetic base metal. If it doesn’t stick, it’s likely solid brass. Solid brass also tends to feel noticeably heavier.
If your fixture is brass-plated, treat it like lacquered brass (soap and water only) unless you’re comfortable risking the plating.
Lacquered Brass vs. Unlacquered Brass
This is the single most important distinction for cleaning.
Lacquered brass has a clear protective coating. It looks smooth, uniformly shiny, and doesn’t show the uneven colouring that comes with natural ageing. If it appears dull, the lacquer itself might be dirty or degrading.
Unlacquered brass (sometimes called a “living finish”) has no protective coating. It darkens over time, develops uneven patches of colour, and builds up what’s called patina. Antique and inherited chandeliers are almost always unlacquered.
Using brass polish, vinegar, or baking soda on lacquered brass will damage or strip the coating, and the damage is difficult to reverse.
The Acetone Test
Not sure which type you have? Choose an inconspicuous spot, like the top of an arm or inside the canopy. Dab a cotton swab with acetone (nail polish remover works). Rub gently. If a yellow residue appears on the swab or the surface becomes tacky, your brass is lacquered.
Patina
Patina is the dark oxide layer that forms on unlacquered brass over time. It is not damage. Many people actually prefer the look of aged brass, and some chandelier finishes (Antique Brass, Aged Brass, Heirloom Brass) are designed to mimic this effect. If your chandelier has an intentional patina, you’ll want to preserve it rather than polish it away.
Fixtures with intricate metalwork, like the Cusco chandelier, benefit from their detailed surfaces catching light differently as patina develops.
Tarnish
Tarnish is surface discolouration caused by oxidation. It ranges from a slight dulling to dark brown or black spots. In Indian homes, tarnish appears faster due to humidity, cooking fumes, and air pollution. Coastal regions see the worst of it.
Verdigris
The green crust you sometimes see on old brass. It forms when copper in the alloy reacts with oxygen, moisture, and environmental acids. Verdigris is more common in bathrooms, kitchens, and homes near the coast. It’s the brass equivalent of rust on iron, though brass won’t corrode all the way through.
Safety and Preparation Checklist
Every method for cleaning a brass chandelier without removing it starts with the same preparation steps. Don’t skip any of them.
- Turn off the power at the circuit breaker. Not just the light switch. The breaker. Water and electricity are a dangerous combination.
- Lay a drop cloth or old bedsheet underneath the chandelier to catch drips, debris, and any cleaning solution.
- Dust first, before any liquid touches the fixture. Use a microfiber cloth, soft duster, or vacuum with a brush attachment. Wet dust smears and sticks, making cleaning harder. A magnetised duster works better than feather dusters because it attracts particles instead of scattering them.
- Never spin the chandelier to reach the other side. Reposition your ladder instead. Spinning can damage internal wiring and loosen connections.
- Wear cotton gloves. The natural oils and acids on your fingertips accelerate tarnishing on freshly cleaned brass.
Cleaning Methods: A Complete Guide by Brass Type
The right method depends entirely on your brass type and the severity of the tarnish. Here’s every effective approach, ranked from gentlest to most aggressive.
Method 1: Mild Dish Soap and Warm Water (All Brass Types)
This is the universal safe option. It works on lacquered brass, unlacquered brass, and brass-plated fixtures alike.
How to do it:
- Mix a few drops of mild dish soap into a bowl of warm water.
- Dip a soft microfiber cloth into the solution and wring it out thoroughly. The cloth should be damp, not dripping.
- Wipe down all brass surfaces, paying extra attention to crevices and decorative details.
- Immediately follow with a dry, clean cloth. Water spots form quickly on brass.
This method won’t remove heavy tarnish on unlacquered brass, but it handles dust, grime, fingerprint oils, and light discolouration effectively.
Method 2: White Vinegar and Salt (Unlacquered Brass Only)
For moderate tarnish that soap and water won’t budge.
How to do it:
- Soak a soft cloth in warm distilled white vinegar.
- Dip the cloth into table salt.
- Gently scrub the tarnished areas, working in small circles.
- Rinse with a separate cloth dampened with plain water.
- Dry immediately and thoroughly.
The acetic acid in vinegar dissolves the oxide layer while salt provides gentle abrasion. Never use this on lacquered or plated brass.
Method 3: Salt, Flour, and Vinegar Paste (Unlacquered Brass, Heavier Tarnish)
When the vinegar and salt cloth method isn’t cutting through stubborn tarnish, this paste gives you more contact time.
How to do it:
- Mix equal parts salt, flour, and white vinegar to form a thick paste.
- Apply the paste to tarnished areas with a soft cloth or gloved hand.
- Let it sit for 10 to 15 minutes. The vinegar continues dissolving tarnish while the flour holds the mixture in place.
- Rinse with warm water using a damp cloth (not running water, to avoid electrical components).
- Buff dry immediately.
Working overhead with a paste is messy. This is where your drop cloth earns its place.
Method 4: Lemon Juice and Baking Soda Paste (Unlacquered Brass, Moderate Tarnish)
The fastest-acting natural method for moderate tarnish.
How to do it:
- Squeeze fresh lemon juice into a bowl.
- Add baking soda gradually until you get a fizzing paste.
- Apply to tarnished areas with a soft cloth or old toothbrush for detailed sections.
- Let it sit for 5 to 10 minutes.
- Wipe clean with a damp cloth and dry thoroughly.
The citric acid from lemon dissolves copper oxide, the baking soda provides gentle abrasion, and the fizzing reaction helps lift grime from crevices. This is particularly useful for chandeliers with ornate patterns where dirt hides in grooves.
Method 5: Ketchup (Unlacquered Brass, Surprisingly Effective)
This sounds bizarre. It works.
Ketchup combines tomato-based acidity with vinegar, creating a mild acidic paste that clings to surfaces. Multiple practitioners on Reddit and finishing forums confirm that ketchup works better than store-bought brass cleaner for many applications.
How to do it:
- Apply a generous layer of ketchup directly to the tarnished brass with a soft cloth.
- Let it sit for 10 to 15 minutes. One user who documented the process reported seeing “great progress almost instantly.”
- Wipe clean with a damp cloth.
- Buff dry.
The ketchup method is particularly good at removing heavy tarnish while leaving enough natural patina for a vintage look, which makes it ideal for antique fixtures.
Method 6: Tamarind Paste (The Traditional Indian Method)
This is the method that no Western cleaning guide will tell you about, and it’s been used in Indian households for generations.
Tamarind contains tartaric acid, a natural organic acid that dissolves copper oxide effectively. Combined with a pinch of salt for mild abrasion, it works on the same chemical principle as commercial brass cleaners.
How to do it:
- Soak a small ball of tamarind pulp in warm water for 10 minutes until it softens.
- Mix in a pinch of salt.
- Apply the paste to tarnished brass areas.
- Let it sit for 10 to 15 minutes.
- Wipe clean with a damp cloth and dry immediately.
Tamarind paste is widely available at any Indian grocery store, making this one of the most accessible cleaning solutions for brass chandeliers across the country. For homes in humid coastal areas where tarnish builds up every few months, keeping tamarind paste on hand is a practical habit.
Method 7: Coconut Oil Solution (Gentle Clean with Protection)
Another India-friendly option. Coconut oil gently cleans brass while leaving behind a thin protective barrier that slows future tarnishing. It won’t remove heavy tarnish, but for regular maintenance between deep cleans, it’s effective and safe for all brass types.
How to do it:
- Apply a small amount of coconut oil to a soft cloth.
- Rub gently across the brass surface.
- Buff with a separate dry cloth to remove excess oil and bring up the shine.
Method 8: Commercial Brass Polish (Unlacquered Brass Only)
Products like Brasso are formulated specifically for brass. They work well but should only be used on unlacquered, solid brass.
Apply with cotton wool, work the polish gently into the surface, and remove with a soft cloth. Avoid getting polish on any glass or crystal elements of the chandelier.
A Note on Spray-and-Drip Cleaners
If your brass chandelier has crystal or glass elements, you may have seen “no-wipe” spray cleaners marketed for chandeliers. These work for glass and crystal components by dissolving grime that then drips away. They are not designed for brass tarnish removal. Use them only on the glass parts of your fixture, and clean the brass separately using the methods above.
If your chandelier features crystal prominently, the Crysta collection from ALC Studio showcases fixtures designed with easy-maintenance crystal elements.
Essential Tools for In-Place Chandelier Cleaning
Cleaning a brass chandelier while it hangs requires the right tools to compensate for the awkward angle and height.
Microfiber cloths are non-negotiable. They’re lint-free and won’t scratch brass. Keep at least three on hand: one for the cleaning solution, one dampened with plain water for rinsing, and one dry for buffing.
A telescopic or extendable duster reaches fixtures on high ceilings without a ladder. Some extend to 20 feet, which covers most double-height ceiling installations common in Indian homes.
A soft toothbrush gets into the intricate details and crevices that a cloth can’t reach. Old toothbrushes work perfectly for this.
A spray bottle lets you apply cleaning solution to your cloth rather than directly to the fixture. Never spray liquid directly onto a chandelier because it can seep into electrical connections.
Dryer sheets are a lesser-known finishing tool. Running a dryer sheet over brass arms after cleaning prevents static buildup and repels dust for longer between cleanings. Practitioners on cleaning forums swear by this trick.
Cotton gloves protect the freshly cleaned surface from the acids in your fingerprints, which would immediately start the tarnishing process again.
Common Mistakes That Damage Brass Chandeliers
Understanding how to clean a brass chandelier without taking it down means knowing what not to do. These mistakes cause the most damage.
Using abrasive cleaners on lacquered brass. Scouring pads, steel wool, and even baking soda pastes will scratch through the lacquer. Once the lacquer is breached, the exposed brass underneath tarnishes unevenly, creating a patchy mess that’s hard to fix without professional relacquering.
Spraying cleaning solution directly onto the fixture. Liquid runs downward. It pools in joints, seeps into wiring connections, and creates water spots in places you can’t easily reach. Always apply solution to your cloth first.
Skipping the dusting step. Applying a wet cleaning solution to dusty brass creates a muddy paste that smears across the surface and embeds in crevices.
Using ammonia-based products. Window cleaners and many all-purpose sprays contain ammonia, which creates streaks and breaks down the varnish on metal parts of the chandelier.
Using silver cleaner on brass. One forum user described how their chandelier was cleaned with silver cleaner by mistake. It stripped the finish entirely. Brass plating, once removed, can’t be restored at home. The only option is sending the piece to a plating shop, which is expensive.
Confusing patina with damage. On unlacquered brass, darkening and colour variation is intentional. Polishing away all the patina on an antique piece eliminates the character and aged beauty that makes it special. If you want to preserve the patina while removing grime, the ketchup method or a gentle soap-and-water wipe is the way to go.
Over-saturating with water. Beyond the electrical risk, standing water causes water spots on brass that are surprisingly stubborn. Always use a well-wrung cloth and dry every surface immediately.
Cleaning Brass Chandeliers on High Ceilings
Many Indian homes, particularly those with double-height living rooms and grand foyers, have chandeliers hung well above normal reach. In-place cleaning is actually the preferred method for high-ceiling installations because it avoids the risks of disassembly at height and the complications of reassembly.
For fixtures within ladder reach (up to about 12 feet), a stable A-frame ladder positioned on level ground is sufficient. Reposition the ladder to access different sides rather than reaching or spinning the fixture.
For higher ceilings, a telescopic cleaning pole with a microfiber head handles the dusting stage from the ground. Deep cleaning at height, where you need to apply solution and wipe individual components, typically requires scaffolding or a professional service.
If you’re planning a chandelier for a double-height foyer, consider how you’ll maintain it before you buy. Some fixture designs make in-place cleaning far easier than others. Fixtures with smooth, open frames are simpler to maintain than those with dozens of small ornamental pieces.
Maintenance Schedule for Brass Chandeliers in Indian Homes
Consistency matters more than intensity when it comes to brass care. A regular schedule prevents tarnish from building up to the point where aggressive cleaning is needed.
Every 2 to 3 weeks: Light dusting with a microfiber or magnetised duster. This takes about 5 minutes and prevents the dust layer that accelerates tarnish.
Monthly (especially in humid climates): Inspect for early tarnish spots. Catching tarnish early means you can address it with the gentle soap-and-water method rather than needing vinegar or paste.
Every 3 to 6 months: Deep clean using the appropriate method for your brass type. Homes in coastal regions or areas with heavy air pollution should lean toward the 3-month end. Dry inland areas can stretch to 6 months.
Every 6 months (unlacquered brass only): Apply a thin layer of beeswax or brass wax after deep cleaning. This creates a protective barrier that slows oxidation between cleanings. Silicone spray works too and doesn’t alter the appearance of the chandelier.
Annually: Inspect the wiring, screws, and mounting hardware. While you’re cleaning, look for any loose connections or signs of wear. This is especially important for older and antique fixtures.
When to Call a Professional
Sometimes cleaning a brass chandelier without taking it down isn’t practical or safe. Call in a professional when:
- The fixture is extremely large or hung at a height you can’t safely reach, even with proper equipment.
- The chandelier is heavily tarnished with significant verdigris, especially on an antique piece where you want to preserve value.
- The lacquer has been damaged (peeling, bubbling, or patchy areas) and needs stripping and recoating.
- You’ve accidentally used the wrong cleaner and the finish is compromised.
- The brass plating has worn through in spots, which requires professional replating.
- You’re simply not comfortable working at height or around electrical fixtures.
Professional chandelier cleaning services can also re-wire, re-lacquer, and restore antique fixtures to their original condition. For a truly valuable antique piece, the cost of professional service is worth the peace of mind.
If your current chandelier has seen better days and you’re considering a replacement, a fixture like the Lorient or Reims can bring fresh statement lighting to your space without the maintenance headaches of an aging antique.
Quick Reference: Which Method for Which Brass?
| Brass Type | Safe Methods | Avoid |
|---|---|---|
| Lacquered brass | Dish soap + warm water, coconut oil | Vinegar, salt, baking soda, commercial polish, any abrasive |
| Unlacquered solid brass | All methods listed in this guide | Ammonia, silver cleaner, steel wool |
| Brass-plated | Dish soap + warm water, coconut oil | Anything abrasive, heavy scrubbing, commercial polish |
| Antique (patina-valued) | Soap and water, ketchup (preserves some patina), coconut oil | Aggressive polishing that strips all patina |
Frequently Asked Questions
Can I use Brasso on my brass chandelier while it’s still hanging?
Yes, but only if the brass is unlacquered and solid (not plated). Apply Brasso to a cotton cloth rather than directly to the fixture, work in small sections, and buff each section dry before moving on. Keep it away from any glass or crystal elements.
How often should I clean my brass chandelier in a humid Indian city?
In cities like Mumbai, Chennai, or Kolkata, inspect monthly and plan a deep clean every 3 months. The combination of humidity, salt air (in coastal areas), and pollution accelerates tarnish significantly compared to drier regions.
Will ketchup really clean brass, or is that a myth?
It works. The combination of tomato acidity and vinegar in ketchup dissolves brass tarnish effectively. Multiple users on Reddit and finishing forums report it outperforming commercial products. Apply a generous coating, wait 10 to 15 minutes, and wipe clean.
How do I know if my brass chandelier is lacquered?
Use the acetone test. Dab a cotton swab with nail polish remover and rub an inconspicuous area gently. If yellow residue appears on the swab or the surface feels tacky, the brass is lacquered. Lacquered brass also tends to look uniformly shiny without the uneven colouring of natural ageing.
Can I use a pressure washer or hose to clean my brass chandelier?
Absolutely not. Pressurised water can force moisture into electrical connections, damage delicate components, and strip lacquer or plating. Only use a well-wrung damp cloth.
What’s the best way to clean brass chandelier parts I can’t reach from a ladder?
A telescopic cleaning pole with a microfiber head handles dusting from the ground for fixtures up to about 20 feet. For deep cleaning at extreme heights, professional service is the safest option. Never overreach from a ladder.
Is the green stuff on my brass chandelier dangerous?
Verdigris (the green patina) is not toxic to touch in normal household quantities, but it indicates significant oxidation that should be addressed. It’s most common in high-humidity areas and near kitchens. Clean it with the vinegar and salt method or tamarind paste for unlacquered brass.
Can I prevent my brass chandelier from tarnishing at all?
You can slow tarnishing considerably but not prevent it entirely on unlacquered brass. Apply beeswax or brass wax every 6 months, dust regularly, and use cotton gloves when handling the fixture. The dryer sheet trick (wiping brass arms with a dryer sheet after cleaning) helps repel dust and slows buildup between deep cleans. Lacquered brass resists tarnish as long as the lacquer coating remains intact.
Looking for a new chandelier that suits your space perfectly? Explore ALC Studio’s full collection of designer chandeliers, pendants, and lighting fixtures with pan-India delivery and free design consultations.
0 Comments
There are no comments for this article. Be the first one to leave a message!