
How Do You Clean a Chandelier Without Taking It Down (2026)
TL;DR
You can clean a chandelier without taking it down using one of three methods: spray-and-drip for crystal, spray-and-wipe for mixed materials, or steam cleaning for heavy grease buildup. Always cut power at the circuit breaker (not just the wall switch), use distilled water to avoid mineral spots, and match your cleaning solution to your chandelier’s material. Crystal, glass, brass, chrome, and painted finishes each need different approaches, and using the wrong cleaner can cause permanent damage.
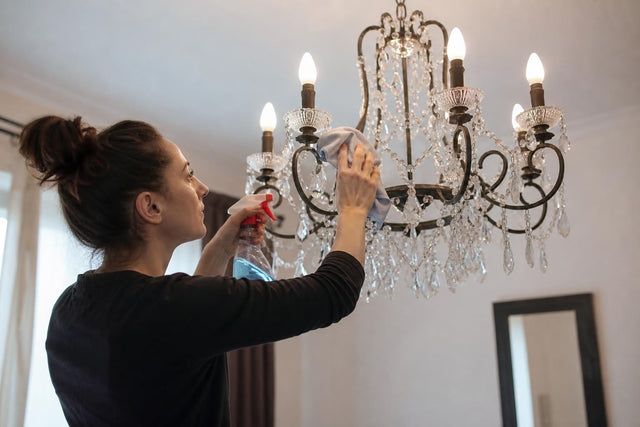
Most chandeliers never need to come down for routine cleaning. The fixture stays mounted, the wiring stays untouched, and you work around it with the right solution, cloth, and technique. That is good news for anyone with a heavy crystal piece hanging from a double-height ceiling or a modern metal pendant bolted into a concrete slab.
This guide covers how to clean a chandelier without taking it down, organized by material type and cleaning method. Whether you own a crystal chandelier or a contemporary metal fixture, the right approach keeps it sparkling without risking damage from disassembly.
The only situations where removal makes sense: structural damage to the canopy, antique restoration requiring professional workshop conditions, or a fixture so encrusted with decades of grime that no spray-on method can reach the buildup. For everything else, clean it in place.
Glossary of Key Terms
Before getting into methods and recipes, here are the terms you will encounter throughout this guide. Understanding them saves time and prevents mistakes.
Drip-dry method: You spray a cleaning solution directly onto the chandelier and let gravity pull the dissolved grime downward onto a drop cloth. No wiping required. Best for all-crystal fixtures with no painted or plated components.
White glove method: You wear white cotton gloves dampened with cleaning solution and wipe each crystal or glass piece by hand. Slower but more controlled, and essential for chandeliers that mix crystal with sensitive metal finishes.
Spray-and-wipe method: You spray the solution onto a cloth (never directly onto the fixture), then wipe. The most versatile approach for mixed-material chandeliers, including modern designs that combine glass with metal frames. Similar principles apply to wall-mounted fixtures as well.
Steam cleaning: A handheld steamer uses hot vapor to loosen grease and grime. Reserved for heavy buildup, particularly kitchen chandeliers coated in cooking residue or inherited fixtures with years of neglect.
Distilled water: Water that has been purified to remove minerals. Tap water leaves white spots on crystal and glass because of its mineral content. Always use distilled water in any chandelier cleaning solution.
Isopropyl alcohol solution: The standard crystal cleaning formula, one part isopropyl alcohol (70% or higher) to four parts distilled water. The alcohol cuts through film and evaporates quickly, reducing streaks.
Ammonia-free cleaner: Any cleaning product that does not contain ammonia. This distinction matters because ammonia strips the finish from gold or silver-plated hooks that hold crystal prisms in place.
Drop cloth / splash zone: A protective covering placed beneath and around the chandelier to catch drips, cleaning solution runoff, and any small pieces that come loose. Old bedsheets or plastic sheeting work fine.
Electrostatic duster: A duster that attracts particles through static charge rather than just pushing them around. Far superior to feather dusters, which can push dust further into metal surfaces or crystals rather than removing it.
Circuit breaker: The panel-level switch that cuts electrical supply to a specific circuit. Turning off the wall switch is not enough, because residual current can still flow. Always kill the circuit at the breaker before cleaning.
Chandelier lift / winch system: A motorized mechanism installed in the ceiling cavity above a chandelier. It lets you lower the fixture to a comfortable working height at the push of a button. A premium solution, but worth considering for double-height living rooms where regular access is otherwise difficult.
Patina: The natural aged surface that develops on brass and copper over time. On antique fixtures, patina is often intentional and valuable. The wrong cleaner (especially vinegar) strips it away permanently.
Cleaning Solutions by Material Type
The single biggest mistake in most chandelier cleaning guides is treating every chandelier as if it were made of crystal. The solution that brightens K9 crystal can permanently damage solid brass. The cloth that polishes brass can scratch hand-blown glass. Match the solution to the material, not the other way around.
| Material | Recommended Solution | Notes |
|---|---|---|
| Crystal | 1 part isopropyl alcohol (70%+) : 4 parts distilled water, plus 1-2 drops dish soap | The gold standard for crystal. Alcohol evaporates fast, minimizing streaks. |
| Glass | 1 part white vinegar : 3 parts distilled water, plus ½ tsp mild dish soap | Vinegar works on glass but must never contact metal parts. |
| Solid Brass | Mild dish soap in warm distilled water (routine) or lemon juice + baking soda paste (for tarnish) | Avoid all acid-based cleaners. |
| Chrome / Stainless Steel | Damp microfiber cloth with minimal water | These finishes are prone to water stains and smudges. Less is more. |
| Painted / Matte Black | Dry or barely damp cloth only | No acids, no alcohol, no vinegar. Any chemical will etch the paint. |
| Acrylic | Damp microfiber cloth with plain distilled water | Acrylic scratches easily and reacts poorly to most cleaners. |
The Vinegar Warning Most Guides Skip
Nearly every competing guide recommends vinegar freely, without qualification. This is dangerous advice. Vinegar damages solid brass by stripping its patina, etches painted finishes, absorbs into natural stone accents, and degrades plated metals over time. If your chandelier has a gold finish or any brass components, keep vinegar away from it entirely.
Before cleaning any chandelier, confirm its material. For brass, there is a simple test: hold a magnet to the fixture. If the magnet does not stick, it is likely solid brass, since brass is non-magnetic. If the magnet does stick, the fixture is probably steel with a brass plating, and you should treat it even more carefully, as plating is thinner and more vulnerable to chemical damage.
Method-by-Method Guide to Cleaning a Chandelier Without Taking It Down
Quick Dusting (Weekly Maintenance)
What it is: A fast pass with an electrostatic or magnetized duster to remove surface dust before it bonds with humidity and grease.
When to use it: Every one to two weeks, especially in high-traffic areas or rooms with open windows.
How to do it:
- No need to cut power for dry dusting, but turn off the light so bulbs are cool.
- Start at the top of the fixture and work downward.
- Use an electrostatic duster, not a feather duster. A magnetized duster attracts dirt directly onto the cloth rather than scattering it.
- For high ceilings, use an extendable pole duster (available up to 20 feet) to avoid ladder use entirely.
Time: 5 to 10 minutes.
This alone prevents most of the heavy buildup that forces deep cleaning. Consistent dusting means you can stretch deep cleans to once or twice a year.
Spray-and-Drip Method (Quarterly Deep Clean)
What it is: You saturate the chandelier with a cleaning solution and let it drip away, carrying dissolved grime with it. No wiping.
Best for: All-crystal chandeliers, like drop-style crystal fixtures, where every surface is glass or crystal with no exposed painted or plated parts.
How to do it:
- Turn off power at the circuit breaker. Wait 30 minutes for bulbs to cool completely.
- Lay a drop cloth or old bedsheet beneath the chandelier. If your floor is wood or marble, add a plastic layer underneath the cloth.
- Remove bulbs and wrap each socket opening with small plastic bags secured by rubber bands to prevent moisture intrusion.
- Fill a spray bottle with your cleaning solution (isopropyl alcohol and distilled water for crystal).
- Spray generously in three passes: top components first, then sides, then the underside. Let gravity do the work.
- Allow 15 to 25 minutes of drip time. In humid conditions (monsoon season, coastal cities), allow up to 30 minutes.
- Inspect for remaining spots. If needed, spray those areas again.
- Remove socket covers, reinstall bulbs, restore power.
Time: 30 to 45 minutes, not counting drying.
A note on mixed results: Practitioners on forum communities report split experiences with drip-dry products. One user on PriceScope described spraying Windex over the whole chandelier and letting it drip, then wiping crystals with a paper towel twice a year with beautiful results. But another user in the same thread warned the results were “terrible,” leaving “a film of yuck on the crystal.” The difference usually comes down to water hardness and product quality. Commercial chandelier-specific sprays tend to outperform general-purpose glass cleaners. And paper towels are not ideal, as they can scratch crystal and leave lint. Use microfiber if you wipe at all.
Spray-and-Wipe / White Glove Method (For Mixed Materials)
What it is: You spray solution onto a cloth or cotton glove (never onto the fixture), then wipe each piece individually.
Best for: Modern chandeliers with metal frames and glass elements. Also ideal for elegant pendant lighting that combines multiple materials.
How to do it:
- Cut power at the breaker. Wait for bulbs to cool.
- Lay a drop cloth beneath.
- Prepare your solution matched to the dominant material (see the table above).
- Put on two pairs of white cotton gloves or have two lint-free microfiber cloths ready: one damp, one dry.
- Spray a small amount of solution onto the damp glove or cloth. Never spray the fixture directly, as moisture buildup in metal components causes rusting or tarnishing.
- Wipe each crystal, glass piece, or metal section with the damp cloth.
- Immediately follow with the dry cloth to prevent water spots.
- For tight crevices (around sockets, decorative arms), use cotton swabs dampened with the same solution.
- Work in sections. Move your ladder around the fixture. Never rotate the chandelier itself.
Time: 45 to 60 minutes for a medium chandelier.
One tester documented on the Seus Lighting blog found that adding the wiping step after spraying took an extra hour and actually left faint smudges on an all-crystal chandelier. The takeaway: if your fixture is all crystal with no sensitive metal parts, skip the glove method and use spray-and-drip instead. Reserve the glove method for mixed-material pieces where you need to keep solution off certain surfaces.
Steam Cleaning (For Heavy Buildup)
What it is: A handheld steamer produces hot vapor that loosens caked-on grease and grime without chemicals.
When to use it: Kitchen chandeliers coated in cooking grease. Inherited fixtures with years of accumulated film. Smoke-damaged fixtures after a house fire or near a fireplace.
How to do it:
- Cut power. Let bulbs cool.
- Protect the floor and furniture beneath.
- Fill the handheld steamer with distilled water (tap water will deposit minerals through the steam).
- Hold the nozzle 6 to 8 inches from the surface. Steam heat breaks down grease that spray cleaners struggle with.
- Work in small sections, following with a dry microfiber cloth.
- Pay extra attention to joints and crevices where grease accumulates.
Equipment cost: Handheld steamers suitable for this run between $40 and $120. A worthwhile investment if you have a kitchen chandelier.
Time: 45 to 75 minutes depending on fixture size and grime level.
Safety Precautions You Cannot Skip
These are non-negotiable, regardless of which method you choose.
Power off at the circuit breaker. Not the wall switch, not a dimmer, not a smart home app. Go to your electrical panel and flip the breaker for that circuit. Verify the light is dead before touching anything.
Never rotate the chandelier. This is the most commonly ignored safety rule and one of the most dangerous. Rotating a chandelier risks loosening its ceiling support, which could cause the entire fixture or its crystals to fall. Instead, move your ladder or your body around the chandelier and clean in sections.
Ladder safety. Use a sturdy A-frame ladder on a flat, stable surface. Never stand on the top two steps. If your chandelier hangs in a stairwell or over uneven ground, consider scaffolding instead.
Bulb cooling time. Halogen bulbs in particular retain heat for 20+ minutes after being switched off. Touching a hot bulb with a wet cloth can cause it to shatter.
High-Ceiling and Double-Height Room Tips
Double-height living rooms and grand foyers are increasingly common in Indian homes, especially in urban metros. Ceilings of 14 to 20 feet make chandelier cleaning genuinely challenging. If you are choosing lighting for a double-height ceiling, factor in long-term maintenance access from the start.
For routine dusting (no ladder needed): Extendable pole dusters reach up to 20 feet. Combine an electrostatic head with a telescoping aluminum pole. This handles weekly dust removal without any climbing.
For deep cleaning at height: A standard household ladder is safe up to about 12 feet of ceiling height. Beyond that, you need either scaffolding or a professional. For ceilings above 15 feet, professional cleaning services are generally the safer choice. Professional chandelier cleaning typically costs between $100 and $250 depending on fixture size and complexity.
Chandelier lift systems: These motorized winch mechanisms install in the ceiling cavity above your chandelier and let you lower the fixture to a comfortable working height with a remote control or wall switch. They are a premium solution, but for a large fixture in a 20-foot foyer, they eliminate the need for ladders or professional visits entirely. Worth considering at the time of installation rather than as a retrofit.
If you are planning a foyer chandelier installation, discuss cleaning access with your electrician before the fixture goes up. A junction box positioned to accommodate a future lift system costs very little during construction but saves significant money later.
Cleaning Frequency by Room Placement
One generic schedule does not work. Different rooms expose chandeliers to different contaminants at different rates.
| Room | Dust Frequency | Deep Clean Frequency | Why |
|---|---|---|---|
| Kitchen | Monthly | Every 3 months | Cooking grease and food particles bond to surfaces quickly |
| Dining room | Every 2 weeks | Every 6 months | Candle soot, food vapors, regular use |
| Foyer / Entryway | Every 2 weeks | Every 6 months | High traffic, door opening brings in outside dust |
| Living room (open plan) | Every 2 weeks | Every 6 months | Airflow carries dust from other areas |
| Bedroom | Monthly | Annually | Closed environment with less airborne contamination |
| Bathroom | Monthly | Every 6 months | Humidity causes mineral deposits, not dust |
A statement chandelier for dining spaces deserves attention proportional to its visual impact. A dusty chandelier dims the room and dulls the design.
India-Specific Adjustments
Monsoon season (June through September): Humidity in Indian cities regularly exceeds 80% during monsoons. This accelerates oxidation on metal components and extends drying times for cleaning solutions. Expect homemade solutions to take 25 to 35 minutes to air-dry instead of the usual 15 to 25 minutes. Increase dusting frequency to weekly during this period, and avoid deep cleaning on high-humidity days if possible, as lingering moisture promotes tarnishing.
Urban dust levels: Indian metros have particulate matter concentrations significantly higher than most Western cities. Chandeliers in homes near construction sites or major roads accumulate visible dust within days. If this describes your situation, weekly dusting is a minimum, not a suggestion.
Post-construction cleaning: After any renovation or construction work in the home, do an immediate deep clean of all chandeliers. Construction dust is finer, more abrasive, and bonds more stubbornly than household dust.
Mistakes That Damage Chandeliers
These errors show up repeatedly in forum discussions and professional cleaning accounts. Each one can cause permanent damage.
-
Using ammonia-based cleaners on crystal. Ammonia strips the finish from plated hooks and connectors. If the bottle contains ammonia, keep it away from your chandelier.
-
Using vinegar on brass, plated, or painted finishes. Vinegar is an acid. It belongs on glass and nowhere else on a chandelier.
-
Rotating the chandelier instead of moving the ladder. This risks loosening the ceiling mount. Always reposition yourself, not the fixture.
-
Spraying cleaner directly onto the fixture. For mixed-material chandeliers, direct spraying sends solution into joints, sockets, and metal crevices where it causes corrosion. Spray onto the cloth.
-
Using tap water. Mineral deposits from tap water leave white spots on crystal and glass that are harder to remove than the original grime.
-
Using paper towels. They feel soft but are abrasive enough to micro-scratch crystal surfaces and leave lint behind.
-
Cutting power at the wall switch only. Residual current can still be present. Use the circuit breaker.
-
Skipping the drop cloth. Cleaning solution dripping onto a hardwood floor or marble surface causes staining. And if a crystal piece comes loose, a drop cloth prevents it from shattering on impact.
-
Cleaning in direct sunlight. If your chandelier is near a window, sunlight heats the fixture and causes cleaning solution to evaporate too fast, leaving streaks. Clean in the morning or evening.
Bulb Replacement While You Are Up There
Since you already have the power off and the ladder out, deep cleaning day is the ideal time to inspect and replace bulbs. Check for:
- Blackened or dimming bulbs nearing end of life
- Mismatched color temperatures (mixing warm and cool bulbs in one fixture looks uneven)
- Bulbs that flicker, which may indicate a loose socket connection
Replacing all bulbs at once, rather than one at a time as they fail, ensures even light output and saves you from setting up the ladder again next month.
Frequently Asked Questions
How long does it take to clean a chandelier without removing it?
The spray-and-drip method takes 30 to 45 minutes for a medium-sized crystal chandelier, plus 15 to 25 minutes of drying time. The spray-and-wipe method takes 45 to 60 minutes. Steam cleaning takes 45 to 75 minutes. Add 10 to 15 minutes for setup (drop cloth, bulb removal, socket protection) regardless of method.
Can I use Windex on my chandelier?
Windex contains ammonia, which strips the finish from gold or silver-plated components. If your chandelier is all glass with no metal plating, Windex works. But for crystal chandeliers with plated hooks, arms, or connectors, use an ammonia-free solution instead. The isopropyl alcohol and distilled water mix (1:4 ratio) is safer and just as effective.
How do I know if my chandelier is brass or brass-plated?
Hold a magnet to the metal. If the magnet does not stick, the fixture is likely solid brass, since brass is non-magnetic. If the magnet sticks, you are dealing with a steel or iron base with brass plating. Plated finishes are thinner and more vulnerable to chemical damage, so use only mild dish soap and water, never acidic cleaners.
Is it safe to clean a chandelier by myself?
For ceilings up to about 12 feet, yes, with proper precautions: power off at the breaker, stable A-frame ladder, no rotation of the fixture, and appropriate cleaning solution for the material. Above 15 feet, professional cleaning is the safer option. The in-between range (12 to 15 feet) depends on your comfort with ladders and the weight/complexity of the fixture.
How do I clean a chandelier on a very high ceiling?
For routine dusting, use an extendable pole duster (up to 20 feet). For deep cleaning at heights above 15 feet, hire a professional or install a chandelier lift system that lets you lower the fixture to working height. If you are still in the planning phase for a high-ceiling installation, our guide on 2-story foyer chandelier ideas covers access planning alongside design.
Does monsoon humidity affect chandelier cleaning?
Yes. High humidity slows drying time for cleaning solutions, which means moisture sits longer on metal components and increases the risk of tarnishing or oxidation. During monsoon months, increase dusting to weekly, avoid deep cleaning on the most humid days, and allow extra drying time (30+ minutes instead of the usual 15 to 25).
How often should I deep clean my chandelier?
It depends on the room. Kitchen chandeliers need quarterly deep cleaning due to grease exposure. Dining room and foyer chandeliers benefit from cleaning every six months. Bedroom chandeliers can go a full year between deep cleans. Dust every one to two weeks regardless of room placement.
Not sure which cleaning method suits your particular fixture? ALC Studio offers free design consultations that include care guidance specific to your chandelier’s material and finish. Explore the full collection to find fixtures designed for Indian homes, or visit the showrooms in Delhi (Kirti Nagar) and Lucknow for hands-on advice.
0 Comments
There are no comments for this article. Be the first one to leave a message!